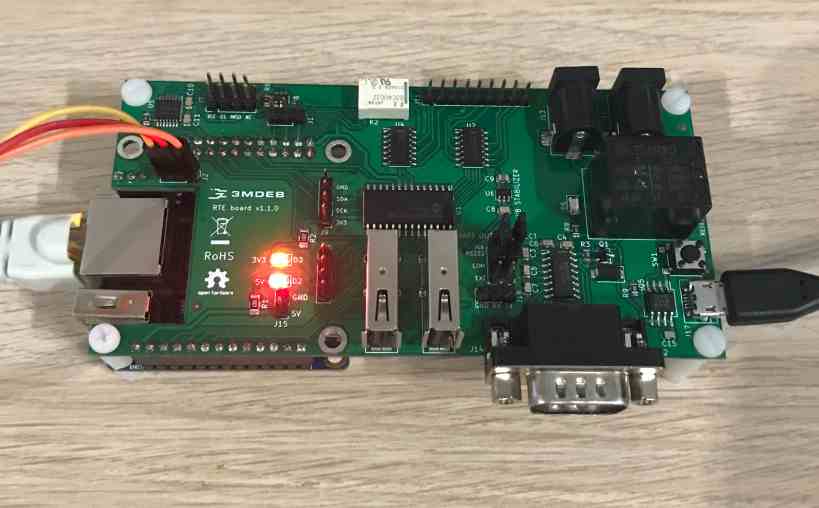
Quick start guide
The canonical example of RTE usage is hooking it to some hardware for SPI flashing, power control and serial logs gathering. This document describes the common preparation of RTE without listed functions.
Prerequisites
- RTE board (this document is based on v1.1.0)
- Micro-USB 5V 2.5A power supply
- Orange Pi
- SD card
- Ethernet cable
- USB-UART converter with 3 wire cables
- Ubuntu (based on 22.04)
Preparation of RTE
- Download the latest version of the RTE image from the meta-rte repository.
-
Flash the SD card using
bmaptoolorbalenaEtcher.- to do this by
balenaEtchergo to the producer site and follow his procedure on how to download and flash an SD card. -
to do this by
bmaptoolreproduce the following steps:-
install
bmaptoolby opening the terminal and typing the following command:sudo apt install bmap-tools -
create the bmap by typing the following command:
bmaptool create /path/to/your/image > /path/where/you/want/bmap/file/saved/bmapfilename.bmap -
flash image to the SD card by typing the following command:
sudo bmaptool copy --bmap ~/path/where/your/bmap/file/is/located /path/where/your/image/is/located /path/to/memory/device
-
- to do this by
-
Insert Orange Pi into RTE.
- Insert SD card into Orange Pi.
- Connect the ethernet cable to Orange Pi.
-
Plug the USB-UART converter into your computer and connect its pins with RTE J2 Header. (you may need a USB extension cable)
UART Converter RTE J2 Header GND GND TXD RX RXD TX -
Open the serial connection with RTE from your PC using a previously connected USB-UART converter by executing the following command:
sudo minicom -D /dev/ttyUSB<x> -b 115200Substitute
<x>with the device number corresponding to your USB-UART Converter for example/dev/ttyUSB0. Thedmesgcommand allows to identify the latest connected devices. -
Plug the power supply into the RTE J17 Micro-USB slot.
- Login into the device by using the default credentials:
- Login:
root - Password:
meta-rte
- Login:
