Initial Deployment
Intro
This document is a guide for the initial installation of Dasharo on a supported device. It assumes some knowledge about external flashing and is primarily aimed at technicians performing the initial installation and not for end users of the devices.
Installing Dasharo
Preparation
On your host computer, install flashrom from sources:
Note
Building from source is required, because the latest flashrom release as of the time of writing does not have support for the flash chip model present in these devices.
- Install build dependencies
apt update
apt upgrade
apt install git build-essential debhelper pkg-config libpci-dev libusb-1.0-0-dev libftdi1-dev meson
dnf group install c-development development-tools
dnf install git debhelper pkgconf-pkg-config pciutils-devel libusb-compat-0.1-devel libftdi-devel meson
-
Clone the flashrom repository:
git clone https://review.coreboot.org/flashrom.git -
Build and install flashrom:
cd flashrom
meson build
ninja -C build
sudo ninja -C build install
Initial Installation
Due to flash protection and Intel ME configuration present in vendor firmware, initial deployment must be performed externally (using a chip programmer like CH341a).
EC installation
Steps for installing Dasharo Embedded Controller Firmware:
-
On the target laptop, boot into Dasharo Tools Suite from a USB stick
-
Ensure power adapter is plugged into the laptop
-
Press
Sto drop to shell -
Download the EC firmware from the Releases page for your device with
wget -
Install the EC firmware:
flashrom -p ite_ec:boardmismatch=force,romsize=128K -w path/to/ec.rom
Note
After flashrom finishes, the internal keyboard will stop working.
To reboot the device and use the newly installed EC firmware you need
to either connect an external keyboard, or set up an SSH server
beforehand to connect and execute a command like reboot.
Otherwise, with no possibility of accessing the terminal,
it will be necessary or disconnect the internal battery to reboot
the device.
BIOS installation
Steps for installing Dasharo BIOS:
- Remove the bottom cover of the laptop.
- Disconnect the primary battery.
-
Disconnect the CMOS battery.
Warning
Disconnecting the CMOS battery will result in the internal date being reset.
-
Attach a WSON-8 probe to the SPI flash chip.
-
Backup the current firmware, in case you want to be able to restore it at some point:
flashrom -p ch341a_spi -r bios_backup.rom -
Install Dasharo BIOS, replacing
[path]with the path to the firmware image you want to flash, e.g.novacustom_v540tu_v0.9.0.rom:-
Step 1: Flash descriptor:
flashrom -p ch341a_spi -w [path] --ifd -i fd -
Step 2: BIOS and CSME:
flashrom -p ch341a_spi -w [path] --ifd -i me -i bios
-
-
Detach the WSON-8 probe.
- Connect the primary battery and reconnect the CMOS battery.
- Power on the laptop. The laptop may shut down once after training the memory.
During the initial installation of Dasharo, you should deploy the supported Intel ME version (and configuration) on the device. Since vendor firmware has enabled Intel Boot Guard and BIOS Guard, it is not possible to do this from within the operating system and external flashing of the whole flash chip using a programmer like the CH341a is required.
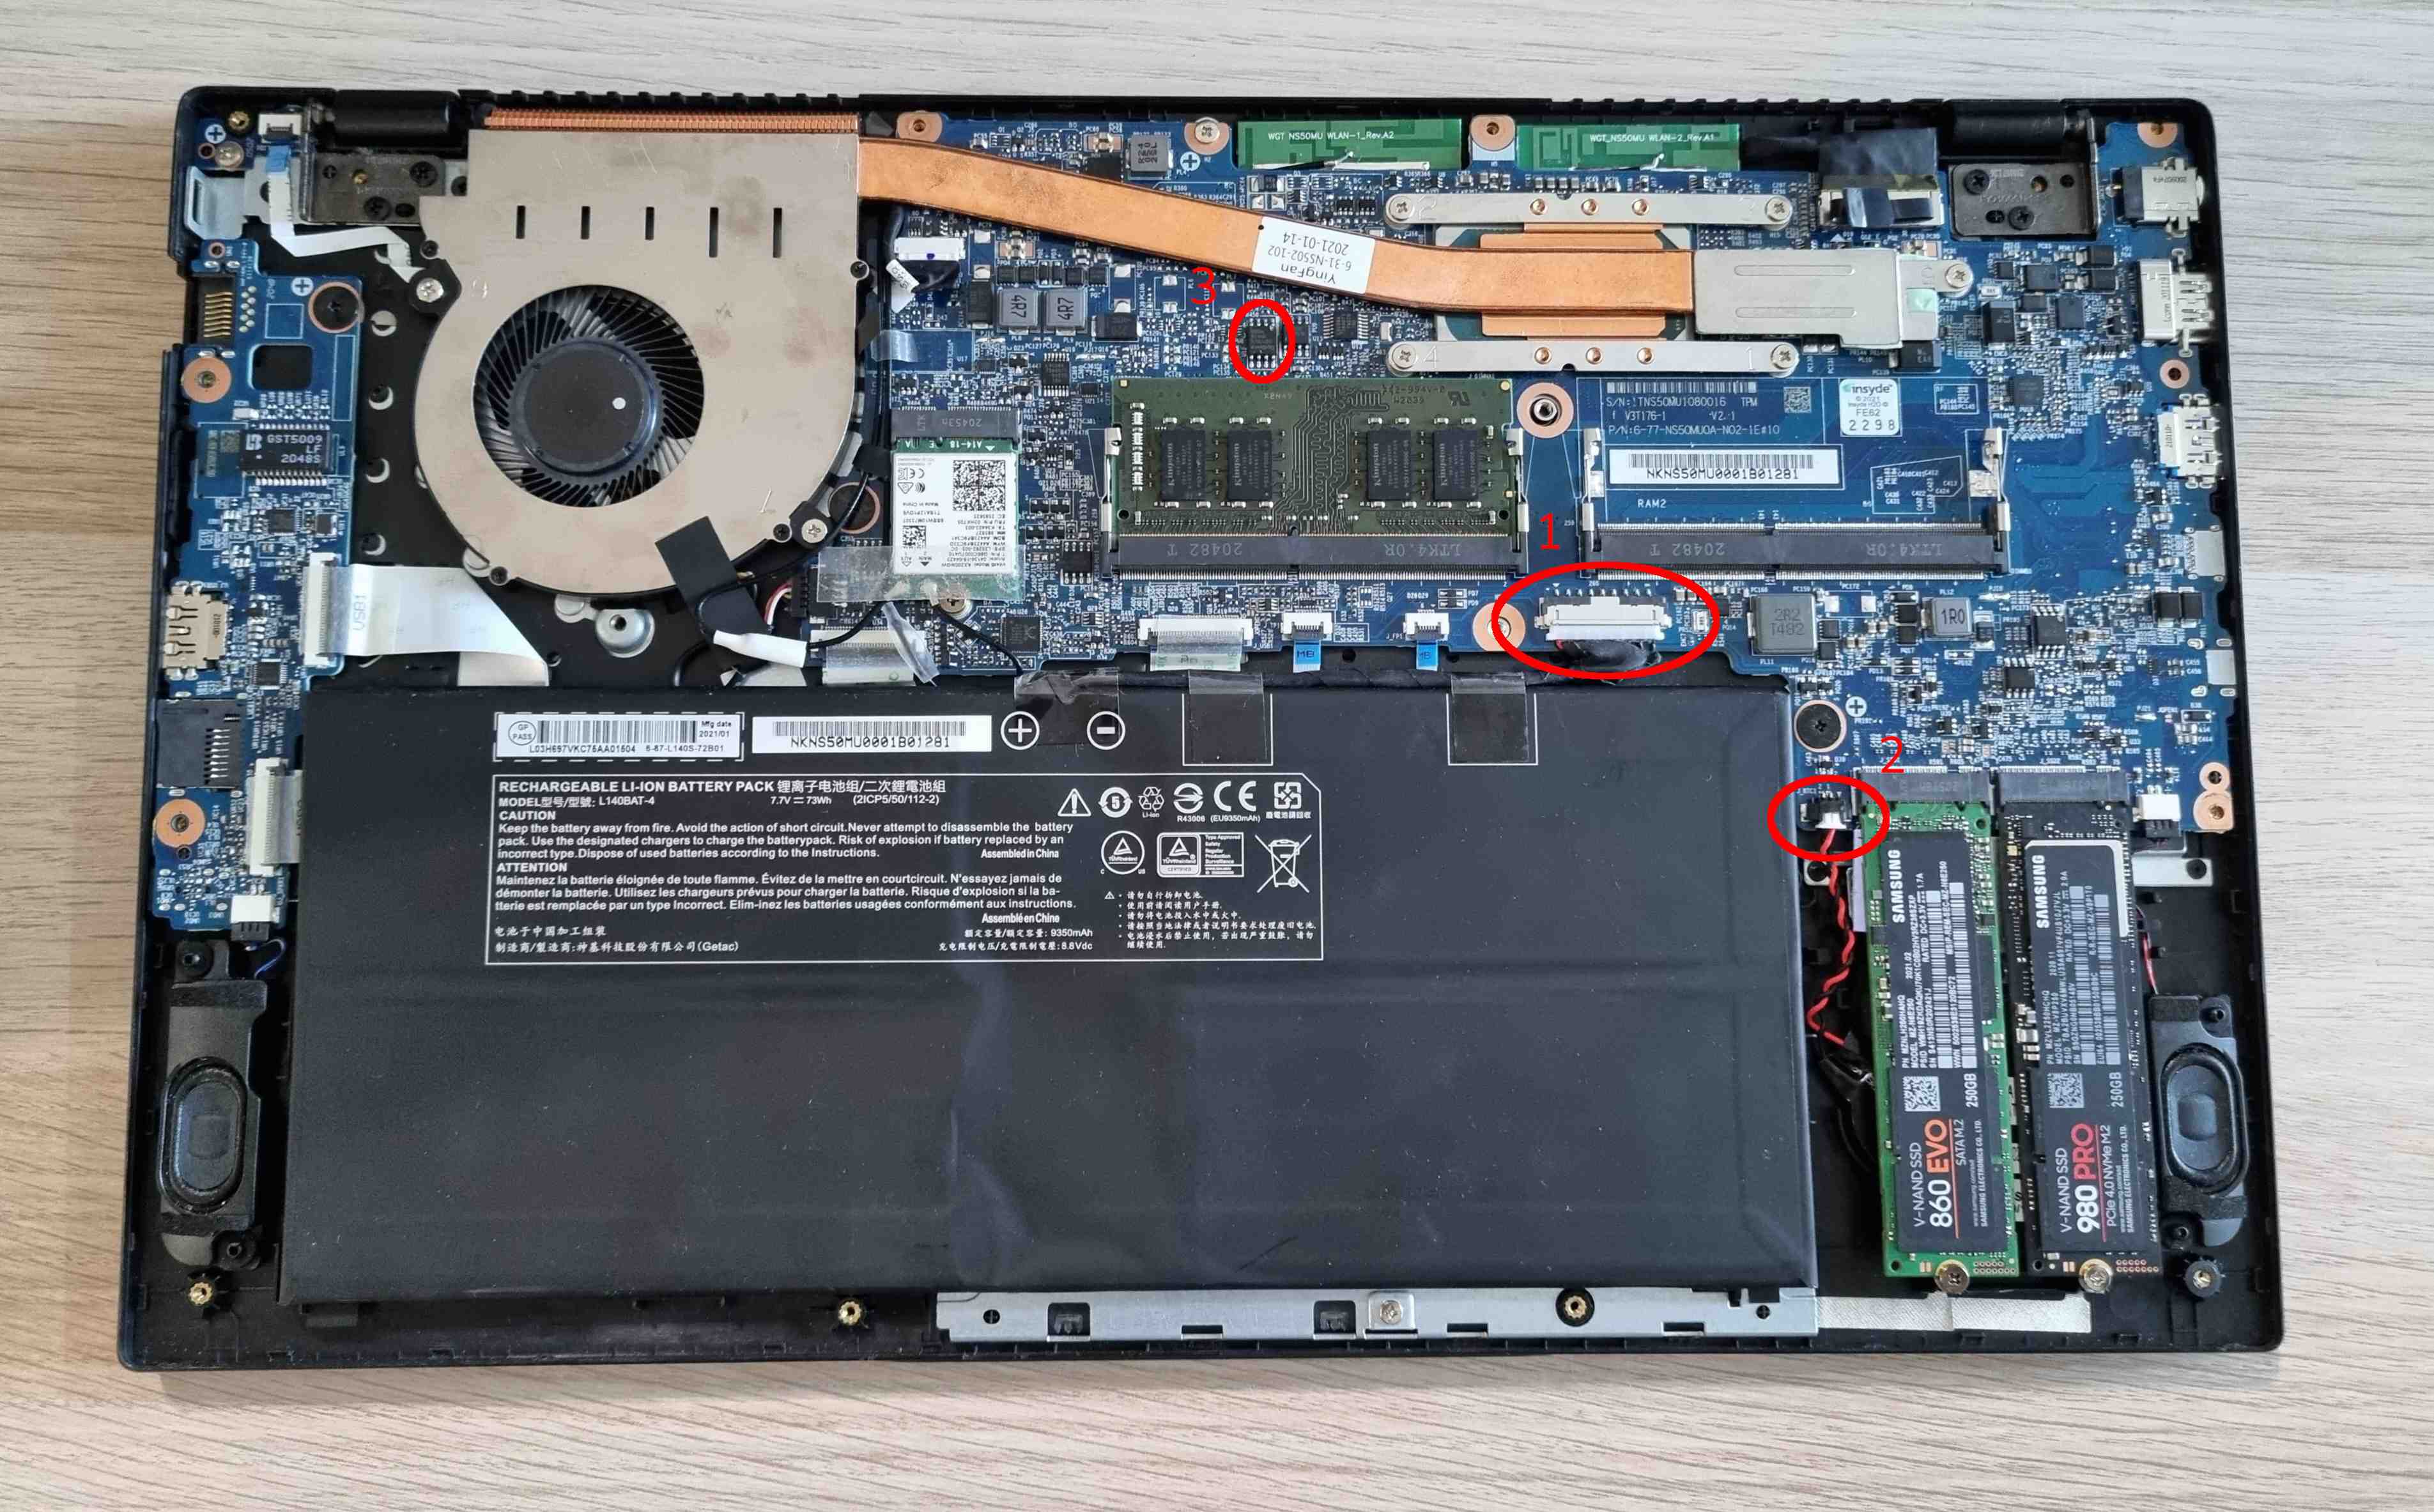
BIOS installation
Steps for installing Dasharo BIOS:
-
Remove the bottom cover of the laptop.
-
Disconnect the primary battery. (1)
-
Disconnect the CMOS battery. (2)
Warning
Disconnecting the CMOS battery will result in the internal date being reset.
-
Attach a WSON-8 probe to the SPI flash chip. (3)
For TGL devices use SOIC clip instead of WSON
-
Backup the current firmware, in case you want to be able to restore it at some point:
flashrom -p ch341a_spi -r bios_backup.rom -
Install Dasharo BIOS, replacing
[path]with the path to the firmware image you want to flash, e.g.novacustom_ns5x_adl_full_v1.4.0.romWarning
Please use the
_fullbinaries, if they're available for a given release. Full binaries contain all necessary blobs for platform operation. Flashing the entire chip with the base binaries for such releases will result in a brick. See issue #1525.flashrom -p ch341a_spi -w [path] -
Detach the WSON-8 probe.
- Connect the primary battery and reconnect the CMOS battery.
- Power on the laptop. The laptop may shut down once after training the memory.
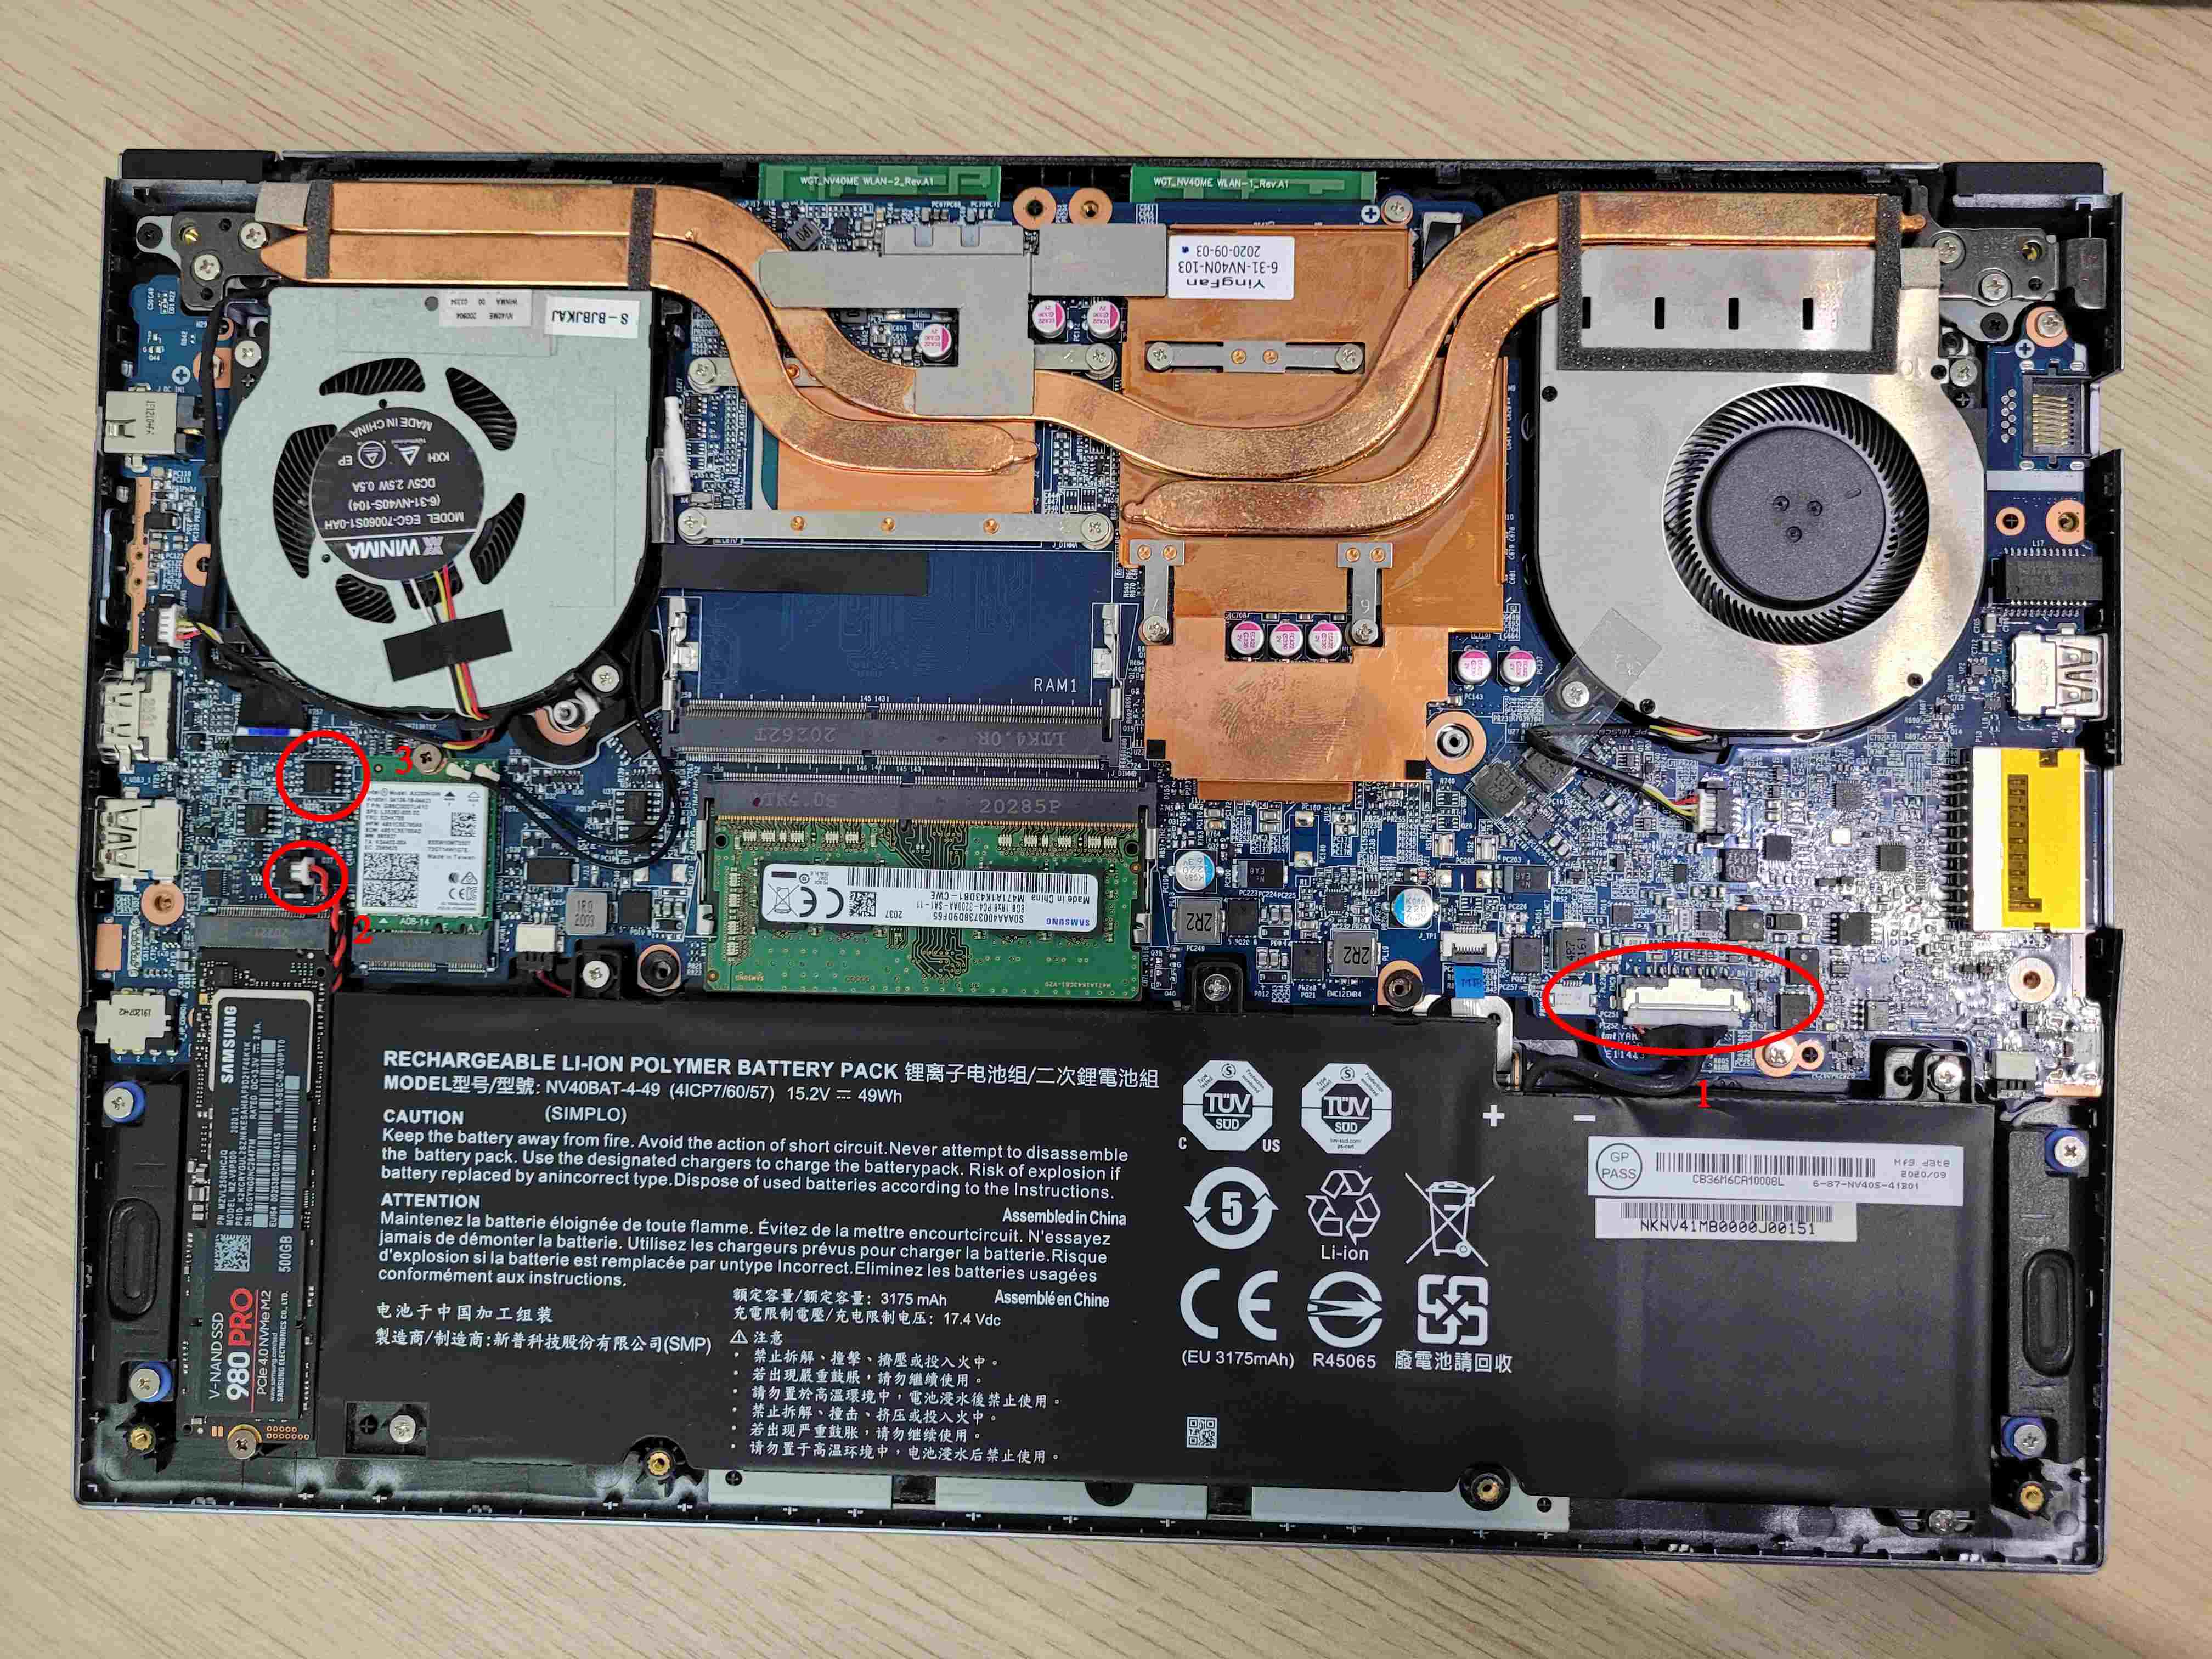
EC firmware installation
Currently, the latest flashrom release lacks support for flashing ITE embedded controllers such as the ones present in NovaCustom laptops. Because of this, we need to build flashrom from source. Run the following commands on the target laptop:
-
Install build dependencies:
apt update
apt upgrade
apt install git build-essential debhelper pkg-config libpci-dev libusb-1.0-0-dev libftdi1-dev meson
dnf group install c-development development-tools dnf install git debhelper pkgconf-pkg-config pciutils-devel libusb-compat-0.1-devel libftdi-devel meson -
Obtain source code:
git clone https://github.com/dasharo/flashrom.git cd flashrom -
Build flashrom:
make sudo make install -
Make a backup of the EC firmware:
Remember to store the backup on the separate device in case flashing fails.
flashrom -p ite_ec -r ec_backup.rom -
Install the EC firmware:
Warning: After running this command, the internal keyboard and power button will stop responding until the device is power cycled (all power must be removed, including the internal battery). Be prepared to disconnect the battery after updating the EC.
Alternatively, you can boot up the laptop without the battery connected and power it from an AC adapter. Then, once the EC update is complete, disconnect the AC adapter to power off the laptop.
Run the following command, replacing
[path]with the path to the EC firmware you want to flash, e.g.novacustom_ns5x_adl_ec_v1.4.0.romflashrom -p ite_ec -w [path]
Successful installation of Dasharo EC finishes the initial deployment process.
Initial deployment
To ensure a smooth deployment process, it is recommended to use the latest version of DTS available from the releases page. Once you have obtained it, you can then proceed with following the Dasharo zero-touch initial deployment section procedure. This will help you set up Dasharo effectively and without manual intervention.
If something went wrong or EC installation was not done, the firmware will print an error string during boot:
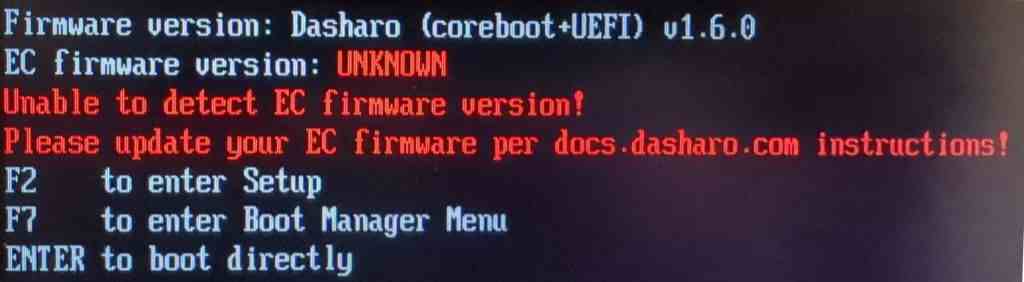
OR
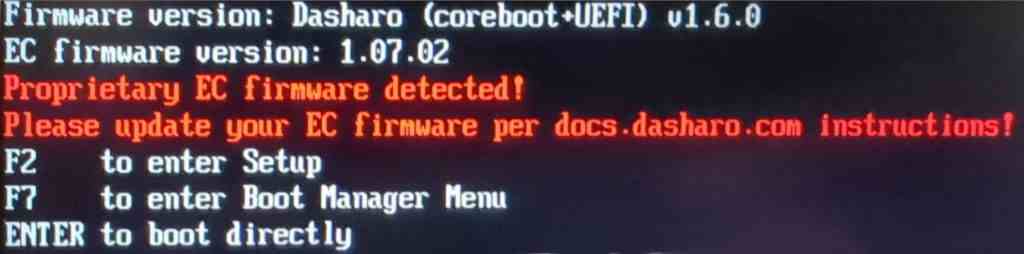
In such case please follow the EC firmware update instructions for a specific board variant.
Initial flashing of Dasharo firmware can be done from Linux using flashrom with the internal programmer.
This document describes the process of building, installing and running flashrom on Ubuntu 24.04.
Flashing Dasharo
To flash Dasharo on the platform, execute the following command - replace [path]
with the path to the Dasharo image you want to flash, e.g. novacustom_nuc_box_v0.9.0.rom.
sudo flashrom -p internal -w [path]
After successful operation, power off the platform, unplug power from the platform, plug it back in and power the platform back on.
coreboot + Heads
The supported method for initial deployment of the coreboot + Heads variant is to follow installing Dasharo, and then transition from Dasharo UEFI to Heads variant.