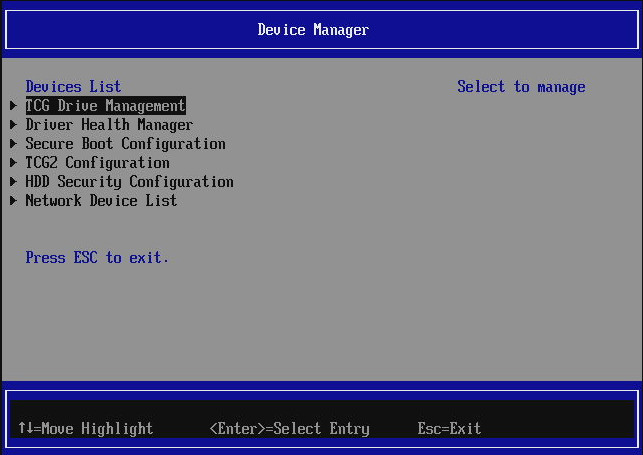
Device Manager
The Device Manager is a EDKII standard submenu which collects various device setups like TPM, UEFI Secure Boot, TCG OPAL Drive Password, SATA Password and others.
TCG Drive Management
This menu allows one to set up TCG OPAL disk password and manage other TCG OPAL feature settings. The main view of the submenu looks as follows:
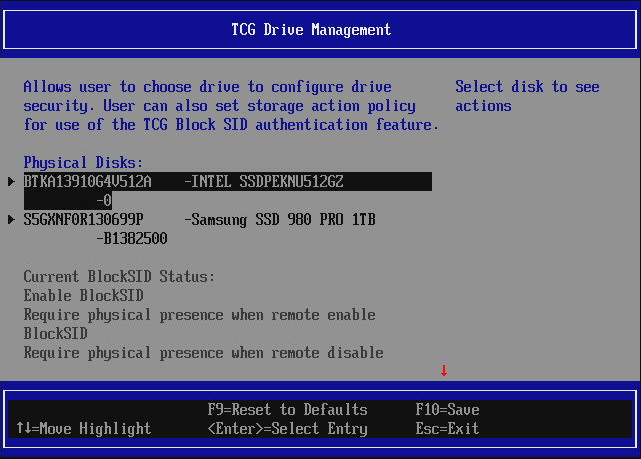
The submenu will list all the TCG OPAL capable disks. Selecting one of them
with ENTER will cause entering the disk specific submenu:
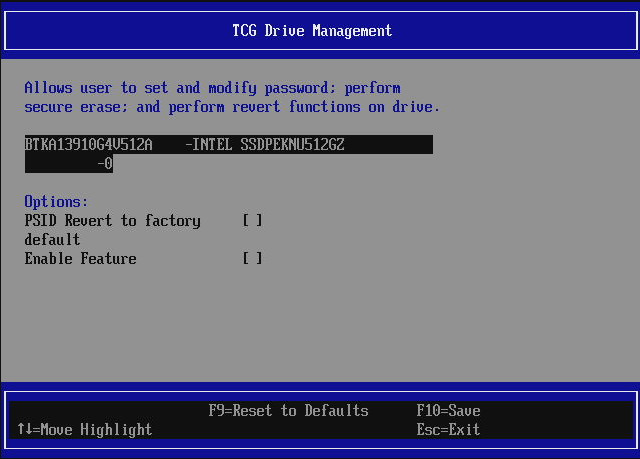
Here one can enable the TCG OPAL security feature or restore factory default with the PSID (Physical Security ID). Physical Security ID is a drive specific key which is used to revert to factory default mode. The PSID can be typically found on the sticker present on the disk.
Besides the feature enablement and factory restore options there is an action interactive entry on the main TCG Drive Management page:
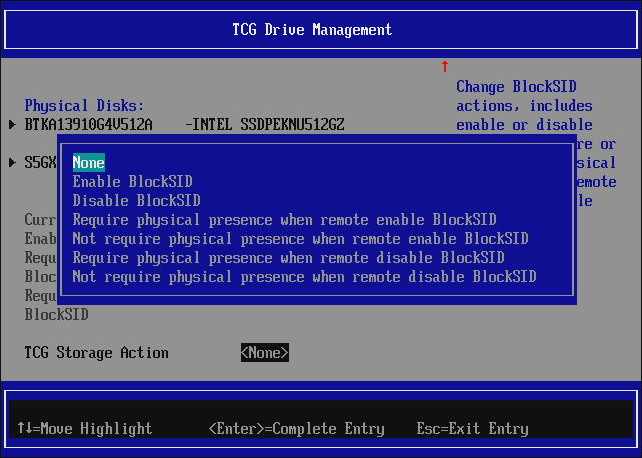
It is used to perform TCG OPAL specific operations when the security feature is enabled. Enable/disable BlockSID will set/unset "freeze locking" of the drive features as requested by OS. One may also enable or disable physical presence (firmware popup confirmation of actions requested by OS) when switching BlockSID.
To set up the password enter the desired disk submenu and enable the feature by selecting the checkbox. Note that not all disks support the security feature of TCG OPAL. Reset is required to apply changes. After reset you will be prompted to set admin password. When the admin password is set, more options become available for the disk:
All below options require reset to apply changes.
Update Drive Admin Password- to update current admin password. Prompt window appears after reset to enter current and new passwordSet Drive User Password- is used to set an optional user password.Secure Erase User Data- performs secure erase of the data after reset.Admin Revert to factory default and Disable- disables the admin password (prompt will no longer appear during boot o unlock the drive) and the security feature after reset. Optionally one may select to keep or discard user data.PSID Revert to factory default and Disable- in case admin password has been forgotten PSID can be used to disable the security feature and admin password after reset. This will also erase user data.Disable User- disables the user functionality (and so the user password) after reset.
For more details about TCG OPAL please refer to TCG Storage Specifications and Key Management.
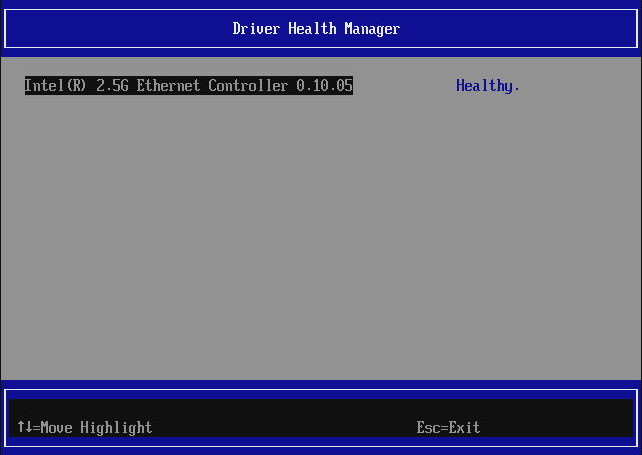
Driver Health Manager
This submenu is informational only and displays the status of drivers that install UEFI driver health protocol. Typically it is installed by 3rdparty applications such as OptionROMs on graphics devices or network controllers for example.
Secure Boot Configuration
This submenu allows configuring UEFI Secure Boot functionality.
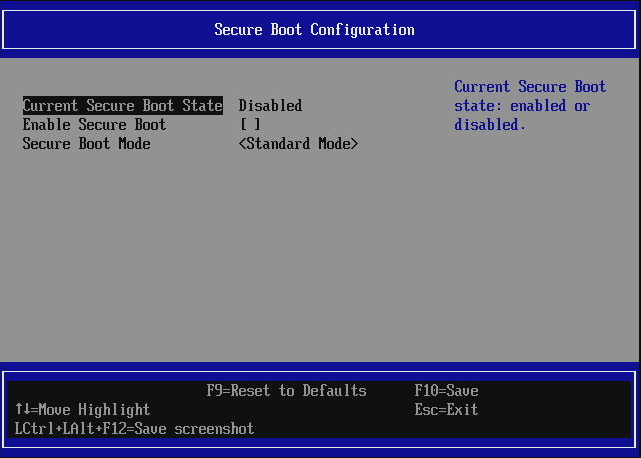
By default, Dasharo firmware boots with the default keys/certificates enrolled (see Custom mode and key management) and default UEFI Secure Boot state depending on platform (in most cases disabled).
Enabling Secure Boot
Switching the Enable Secure Boot option will enable or disable Secure Boot
on next boot.
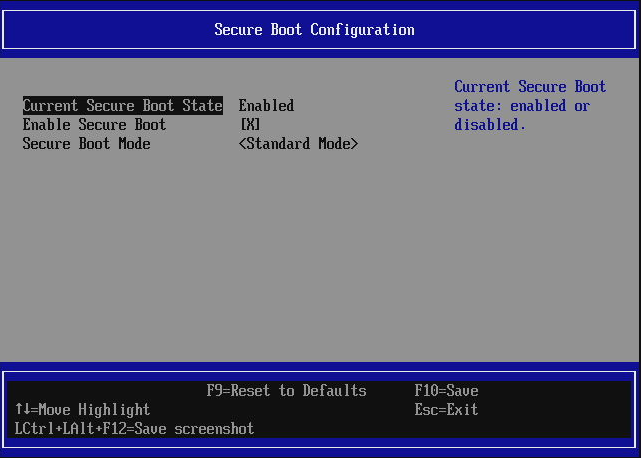
The Enable Secure Boot option will be available (not grayed out) only if the
keys/certificates are provisioned. You may see below image if you erase your
Secure Boot keys/certificates or don't have PK enrolled:

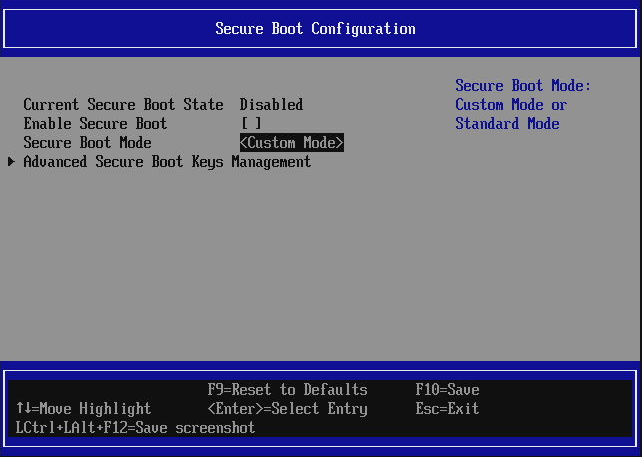
Custom mode and key management
The basic menu allows only enabling or disabling Secure Boot. For advanced
options, switch the Secure Boot Mode from Standard Mode to Custom Mode,
which will cause the Advanced Secure Boot Keys Management submenu to appear.
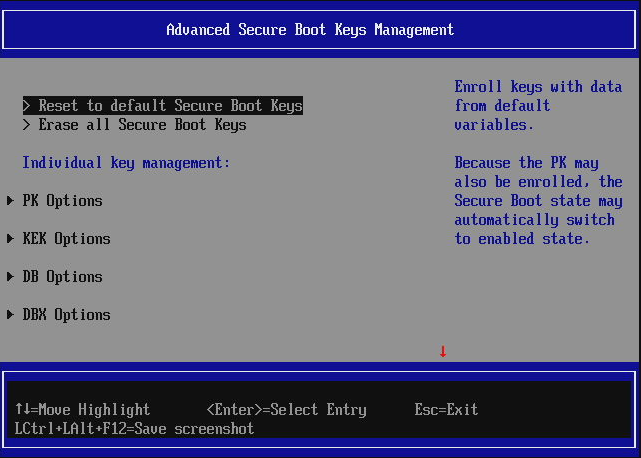
Advanced Secure Boot Keys Management menu content looks as follows:
-
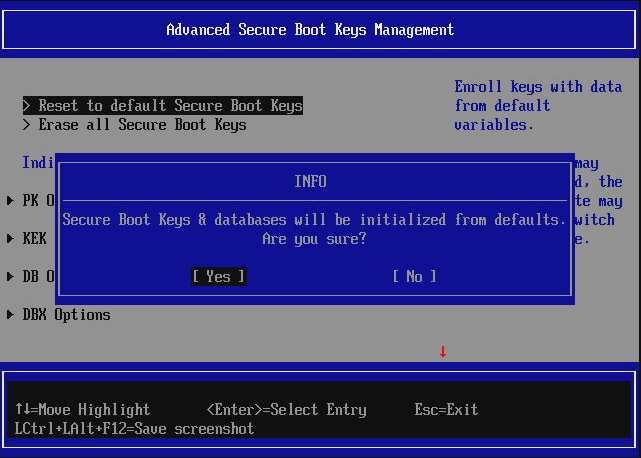
Reset to default Secure Boot Keyswill cause the following keys/certificates to be enrolled:- Microsoft Corporation KEK CA 2011,
- Microsoft Corporation KEK 2K CA 2023,
- Microsoft Signature Database (db) consisting of:
- Microsoft Windows Production PCA 2011 and Windows UEFI CA 2023 to allow Windows OS Loader to load,
- Microsoft Corporation UEFI CA 2011 and Microsoft UEFI CA 2023 to load OEM-approved UEFI drivers and applications (e.g. shim),
- Microsoft Forbidden Signature Database (dbx) published as UEFI Revocation List File on uefi.org,
- Dasharo Platform Key (PK) certificate maintained by the Dasharo team. When custom application and UEFI driver signing is desired, this key may be replaced with the user's own PK.
To learn more about those certificates, please visit Windows Secure Boot Key Creation and Management Guidance.
-
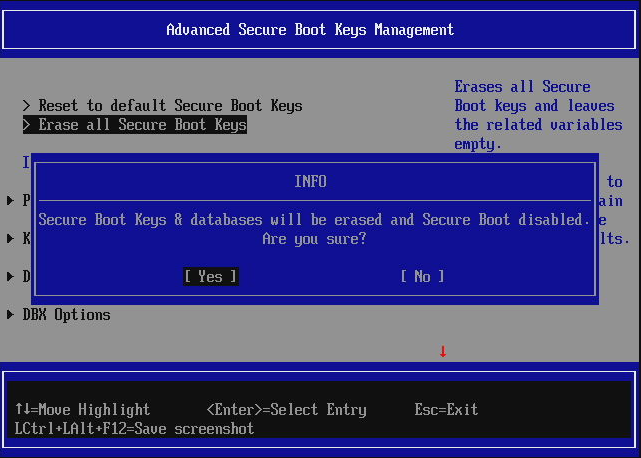
Erase to default Secure Boot Keyswill erase all Secure Boot keys and certificates currently provisioned: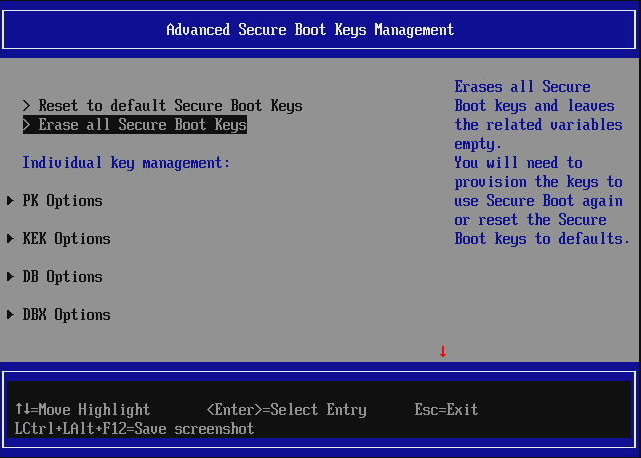
One may also delete and enroll individual keys, certificates and database
signatures via PK/KEK/DB/DBX/DBT Options (scroll the menu down if DBT
Options are not visible).
TCG2 Configuration
TCG2 Configuration submenu is responsible for displaying TPM 2.0 information and managing the module.
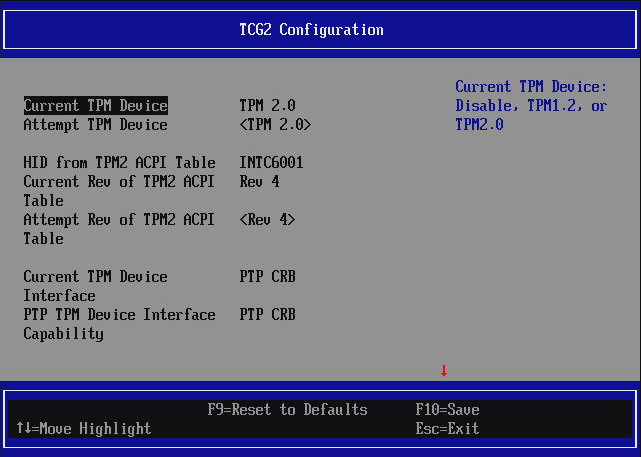
The basic information displayed are the TPM device family, interface, but also information about supported hashing algorithms.
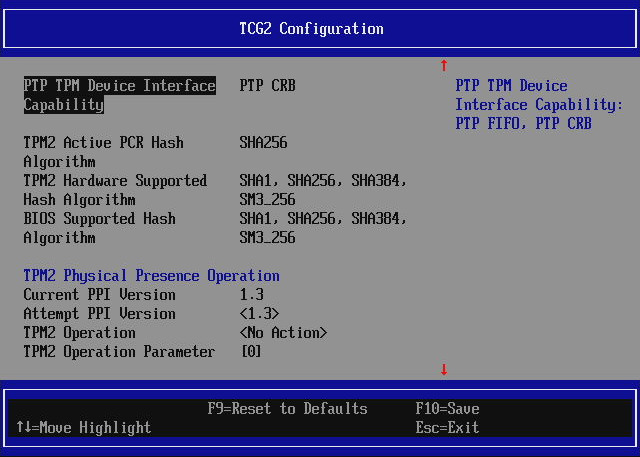
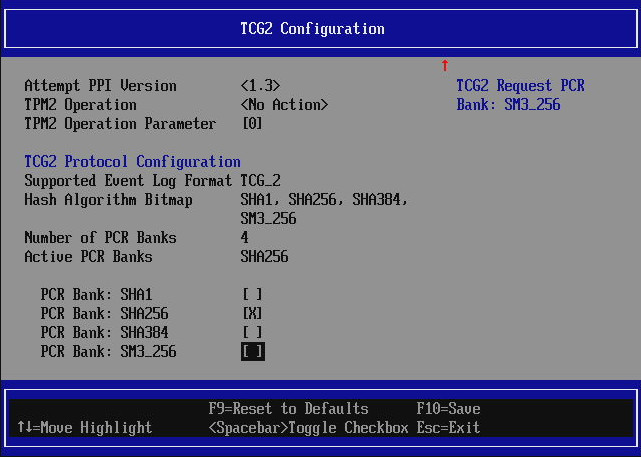
It is also possible to perform various TPM2 physical presence operations
(TPM2 Operation) and enable or disable PCR banks.
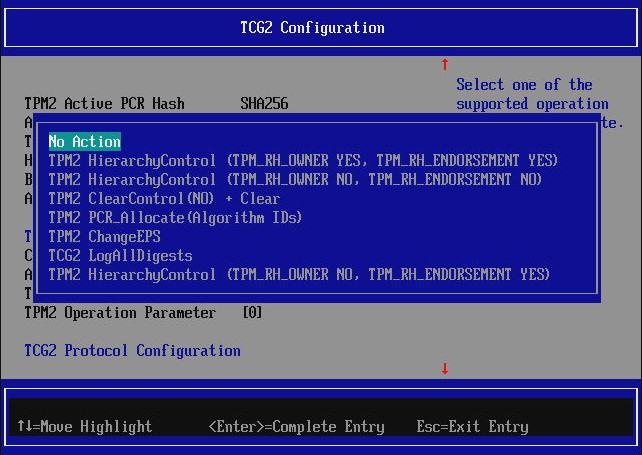
The supported TPM2 operations are:
- Disabling or enabling Owner and Endorsement hierarchies
TPM ClearControl(NO) + Clear- performs TPM clear- PCR Allocation - used to enable additional PCR banks
LogAllDigests- on next reboot (and only on next reboot), add digests for all supported hashing algorithms to log fileChangeEPS- clears the TPM and changes its identity
For more details about the TPM operations see TCG Physical Presence Interface Specification
HDD Security Configuration
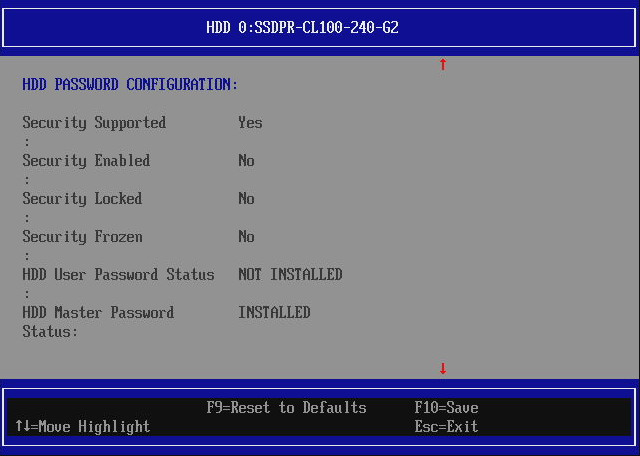
HDD Security Configuration allows one to set SATA disk password. Note that all SATA disks will be displayed, even these that don't support the feature.
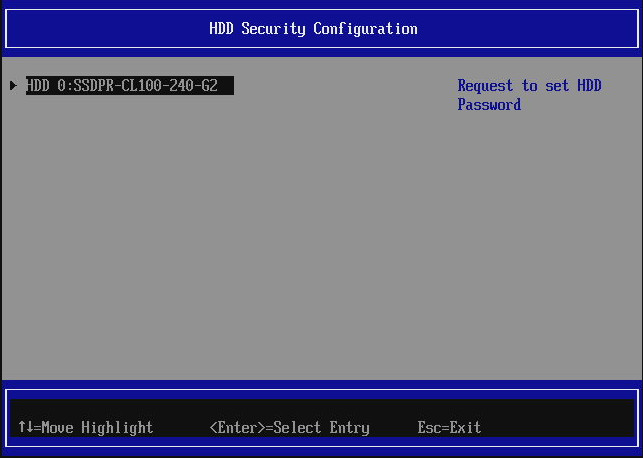
To check if the disk supports password feature, enter the specific disk submenu
to see if Security Supported displays Yes:
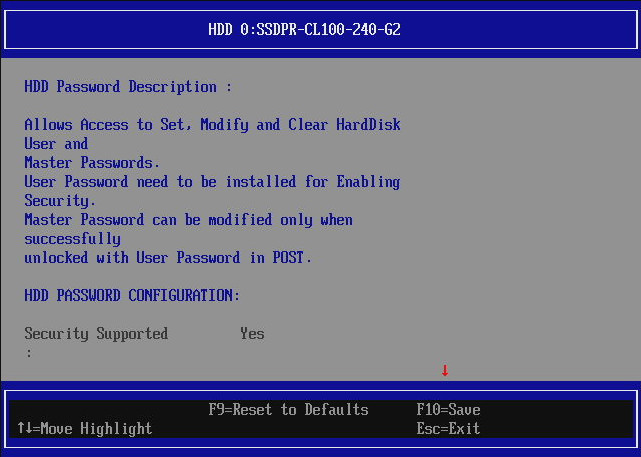
If one scrolls down a bit, more information is displayed about current state of the disk password feature:
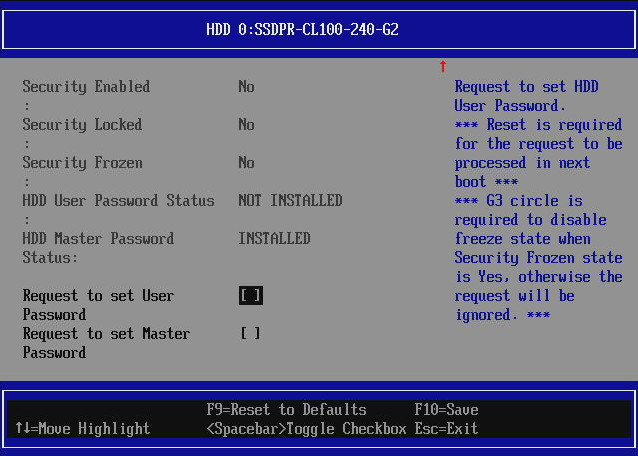
At the bottom of the page there are two checkboxes:
Request to set User Password- this is the option to set the password on the disk. Requires reset, after which the prompt windows will appear to set the password. From now on the prompt will appear on each boot.Request to set Master Password- this options changes the disk master password. Master password is used to recover from forgotten User Password.
Typically Master Password is provisioned during disk manufacturing and it will not be possible to change it without knowing what the master password is.
To disable the User Password simply request to set the User Password again via
the menu. After reset you will be asked to unlock the driver with current
password and then type new password. To disable the password simply leave the
field empty and confirm it twice by pressing ENTER. After that the password
prompt will not appear again.
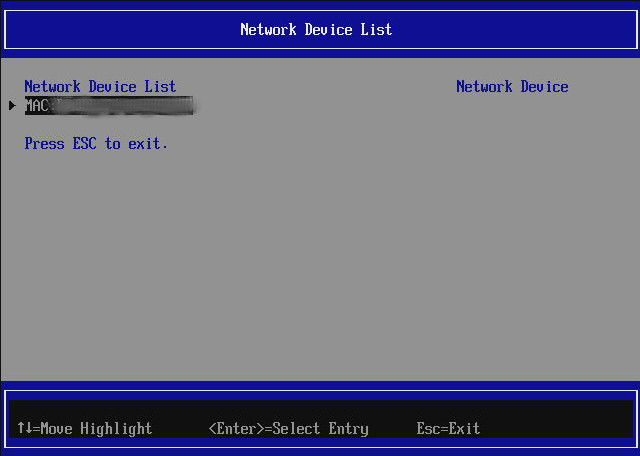
Network Device List
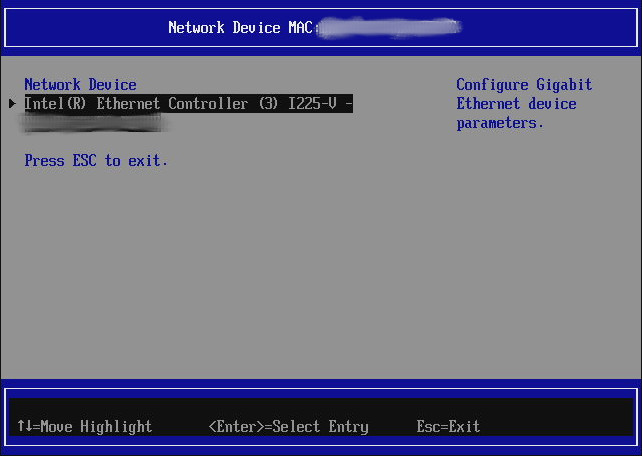
This submenu is displayed when Network Boot is enabled and the network controller driver installs the necessary UEFI protocols. The menu lists the network devices with the UEFI protocol installed. One may check out the network controller information, like MAC address, driver used and link status. Example view with MAC address blurred: