Initial deployment
We strongly recommend following these official instructions. The official guide has a lot of collaborative effort put into covering all of the edge cases and is regularly tested. Following these instructions to the letter without skipping, reordering or adding any steps will give you a proper Dasharo installation unless there's a hardware issue. We strongly recommend against following unofficial guides deviating in any way from the official instructions.
If you have trouble with the installation process, ask for help on the official Dasharo chat channel. There are almost always people around willing to help with it. Before asking for help, make an attempt to follow the guide on your own and then ask for help with anything you get stuck on.
Hardware preparation
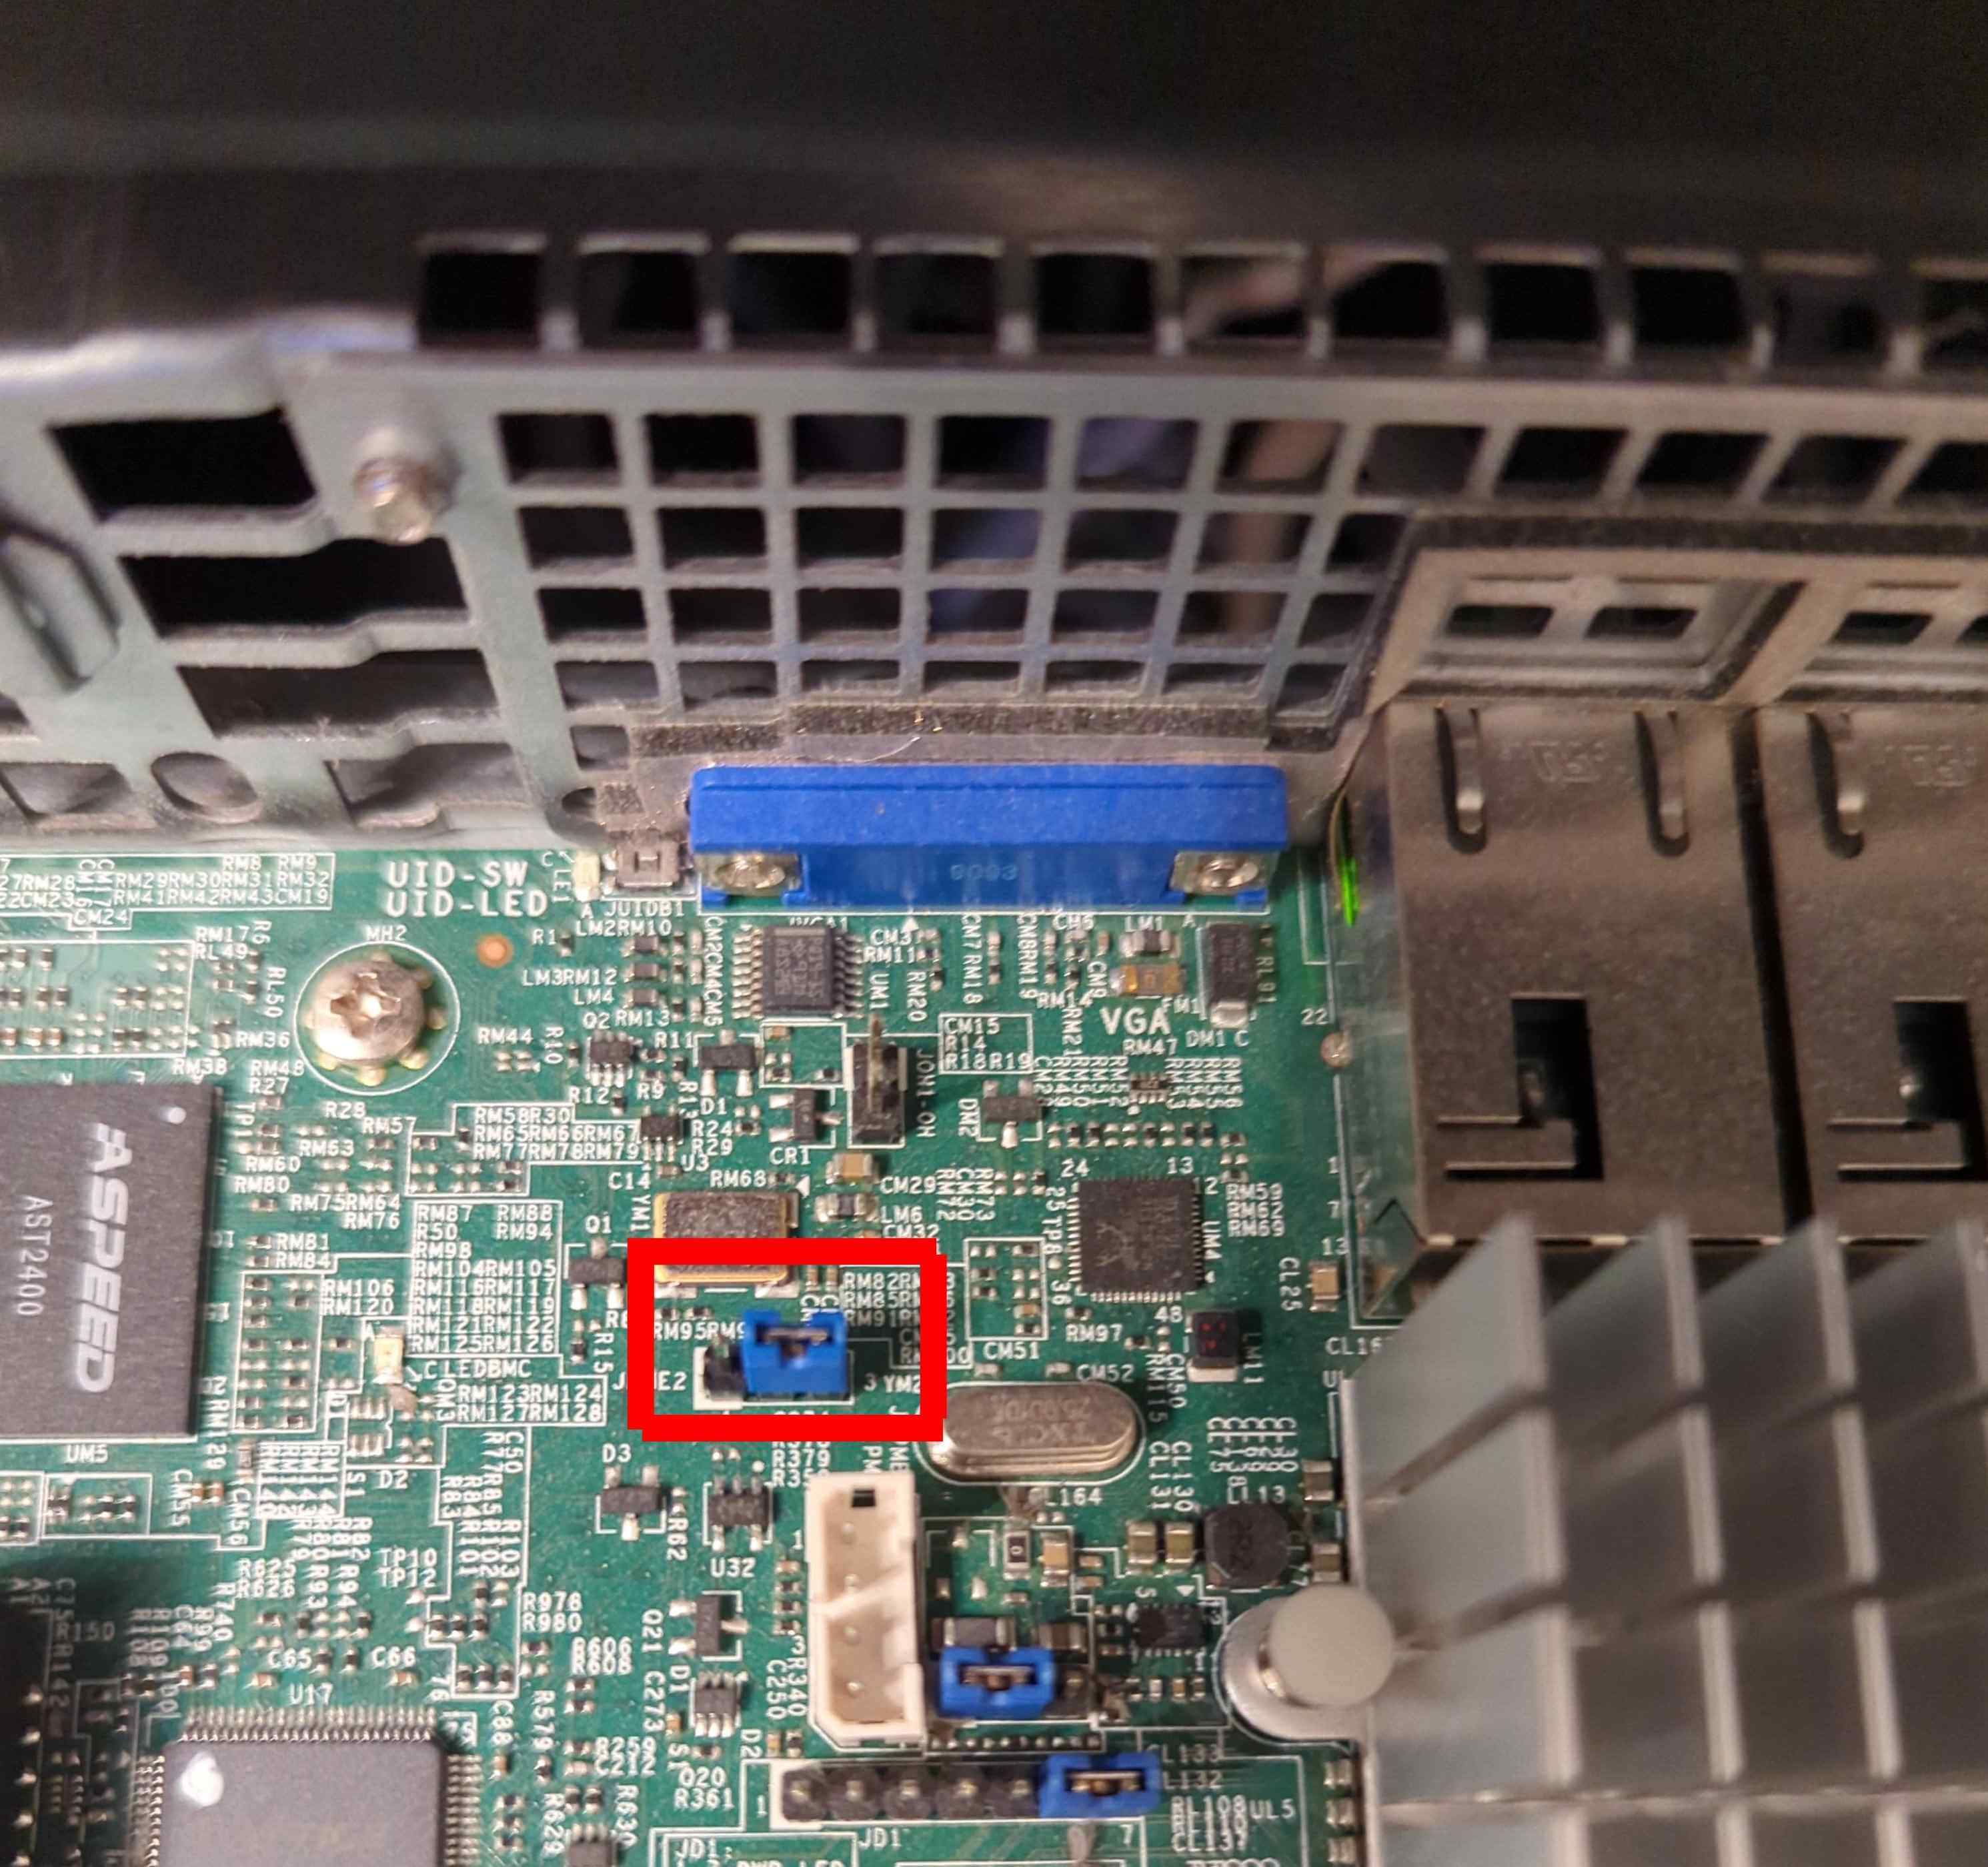
Please use Supermicro Quick Reference Guide for you mainboard e.g. X11SSH-TF. Find JPME2 and change its state to position 2-3, which means ME Manufacturing Mode enabled.
Booting DTS over network
For seamless and storageless deployment one can use BMC virtual floppy functionality to mount a floppy image containing iPXE.
iPXE will allow to boot DTS over network without much effort. The image file can be downloaded from 3mdeb FTP server. If you wish to build the image, please follow instructions in Building iPXE floppy image section.
To boot from the iPXE image, please do the following:
- Download or build the iPXE image on your host machine.
- Log in to the BMC dashboard.
-
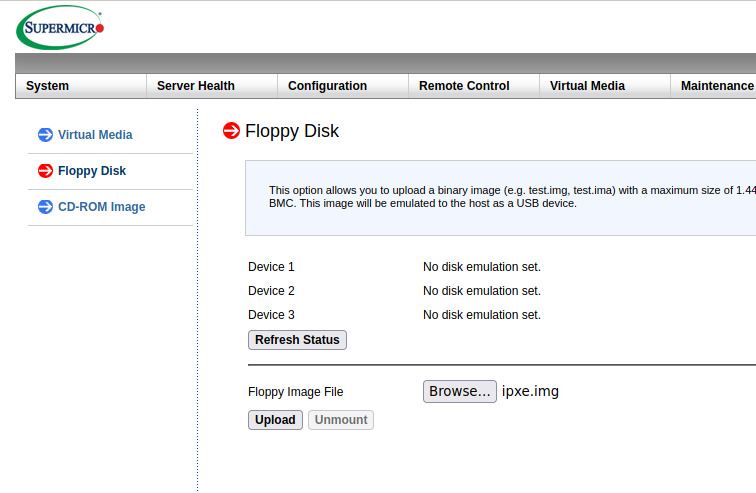
Select the floppy image through Browse button:
-
Upload image to the BMC in the Virtual Media panel, by clicking
Upload: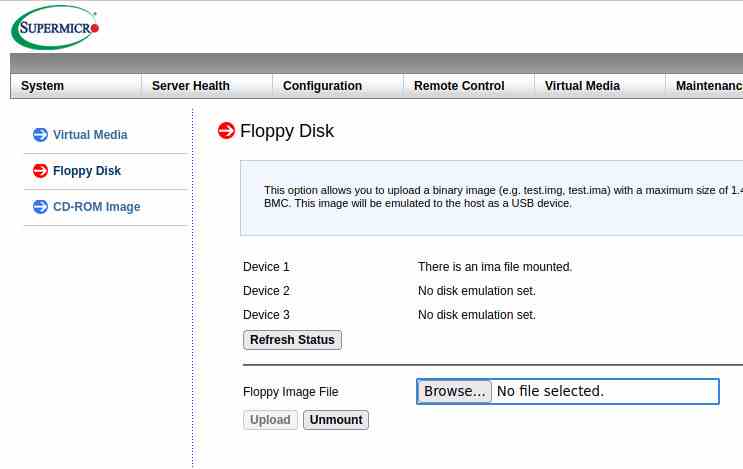
-
Go to
Remote Control -> iKVM/HTML5and startiKVM/HTML5remote control window. - Use
Power Control -> Set Power On - Enter Boot Menu with F11.
- Select
UEFI: ATEN Virtual Floppy 3000, Partition 1. - Wait for the embedded menu to show up (it may take up to 30 seconds for the UEFI protocols to execute during iPXE initialization - proprietary UEFI banzai...).
- Choose
Dasharo Tools Suitefrom the menu:
------------------------ Dasharo Network Boot Menu ------------------------
Autoboot (DHCP)
Dasharo Tools Suite
OS installation (netboot.xyz official server)
iPXE Shell
Vendor BIOS backup
Please follow DTS backup guide.
Installing Dasharo with DTS
TBD
Building iPXE floppy image
To create a floppy disk image for Supermicro BMC Virtual Media, you will need a Linux OS with docker installed. Then follow steps below:
-
Compile iPXE (a sample revision has been taken from top of master branch on 25.01.2023, iPXE unfortunately stopped tagging the code in December 2020). Following set of commands will embed Dasharo iPXE menu script, enable HTTPS and EFI image support and provide custom build ID command to ensure build reproducibility:
- Clone iPXE repository:
git clone https://github.com/ipxe/ipxe.gitcd ipxegit checkout 4bffe0f0d9d0e1496ae5cfb7579e813277c29b0fNOTE: As mentioned above this is sample revision since iPXE code is not tagged.
- Get Dasharo menu for network booting.
wget https://raw.githubusercontent.com/Dasharo/dasharo-blobs/46cc16f6d8f0ed9d057fdd20f15bb89ce5b8d212/dasharo/dasharo.ipxe- Modify iPXE build configuration through
general.h
sed "s|//#define\s*IMAGE_SCRIPT.*|#define IMAGE_SCRIPT|" src/config/general.h > src/config/general.h.tmp mv src/config/general.h.tmp src/config/general.h sed "s|.*DOWNLOAD_PROTO_HTTPS|#define DOWNLOAD_PROTO_HTTPS|g" src/config/general.h > src/config/general.h.tmp mv src/config/general.h.tmp src/config/general.h sed "s|.*IMAGE_EFI|#define IMAGE_EFI|g" src/config/general.h > src/config/general.h.tmp mv src/config/general.h.tmp src/config/general.h- Use coreboot-sdk container to build iPXE binry:
docker run --rm -it -v $PWD:/home/coreboot/ipxe -w /home/coreboot/ipxe \ coreboot/coreboot-sdk:2022-12-18_3b32af950d /bin/bash- Inside container: make sure you use correct cross-toolchain:
export CROSS_COMPILE="x86_64-elf-"- Inside container: start compailation:
make -C src bin-x86_64-efi-sb/ipxe.efi EMBED=$PWD/dasharo.ipxe BUILD_ID_CMD="echo 0x1234567890" \ EXTRA_CFLAGS="-Wno-address-of-packed-member -m64 -fuse-ld=bfd \ -Wl,--build-id=none -fno-delete-null-pointer-checks -Wlogical-op -march=nocona \ -malign-data=abi -mcmodel=large -mno-red-zone -fno-pic" -
Exit docker container with
exitcommand. -
Create image file:
dd if=/dev/zero of=ipxe.img count=1 bs=1440K -
Make FAT filesystem on the image file:
sudo mkfs.fat --mbr=y ipxe.img -
Mount the image file:
sudo mount ipxe.img /mnt -
Copy the iPXE to the mounted image file:
sudo mkdir -p /mnt/EFI/BOOT/ && \ sudo cp src/bin-x86_64-efi-sb/ipxe.efi /mnt/EFI/BOOT/BOOTX64.EFI -
Unmount the image file:
sudo umount /mnt
The resulting ipxe.img file is now ready to be attached as Virtual Media on
Supermicro BMC.