Initial deployment
Please read the overview page first!
Following documentation describe process of replacing original BIOS/UEFI firmware with Dasharo open-source firmware. Following procedure is supported for following models
| Vendor | Model |
|---|---|
| Dell | OptiPlex 7010 SFF |
| Dell | OptiPlex 7010 DT |
| Dell | OptiPlex 9010 SFF |
| Dell | OptiPlex 9010 MT |
Hardware preparation
Flash descriptor security override
To perform any SPI NOR flash operations in the presence of ME, we have to put it in the flash descriptor security override mode. Please follow the below steps:
-
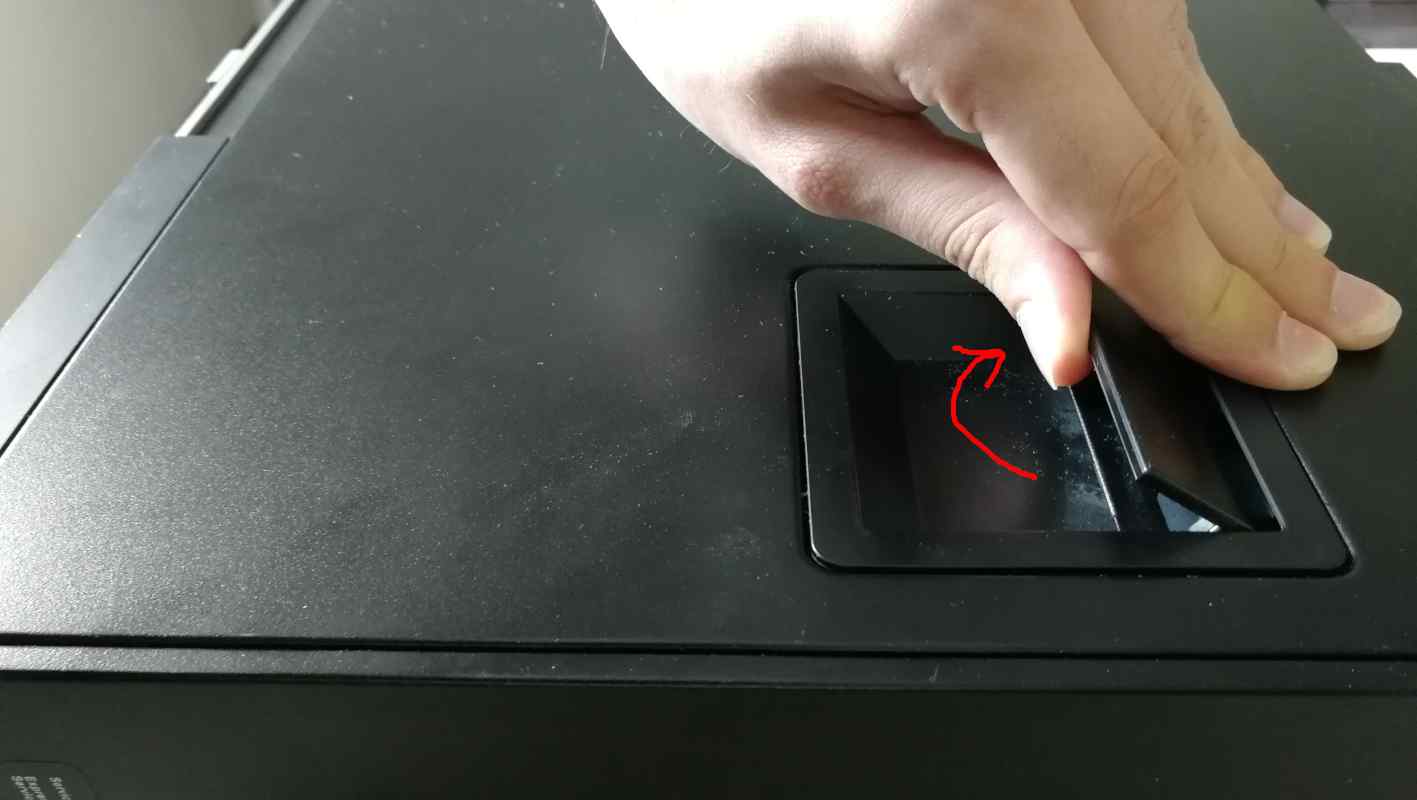
Open the case by lifting the handle on the case.
-
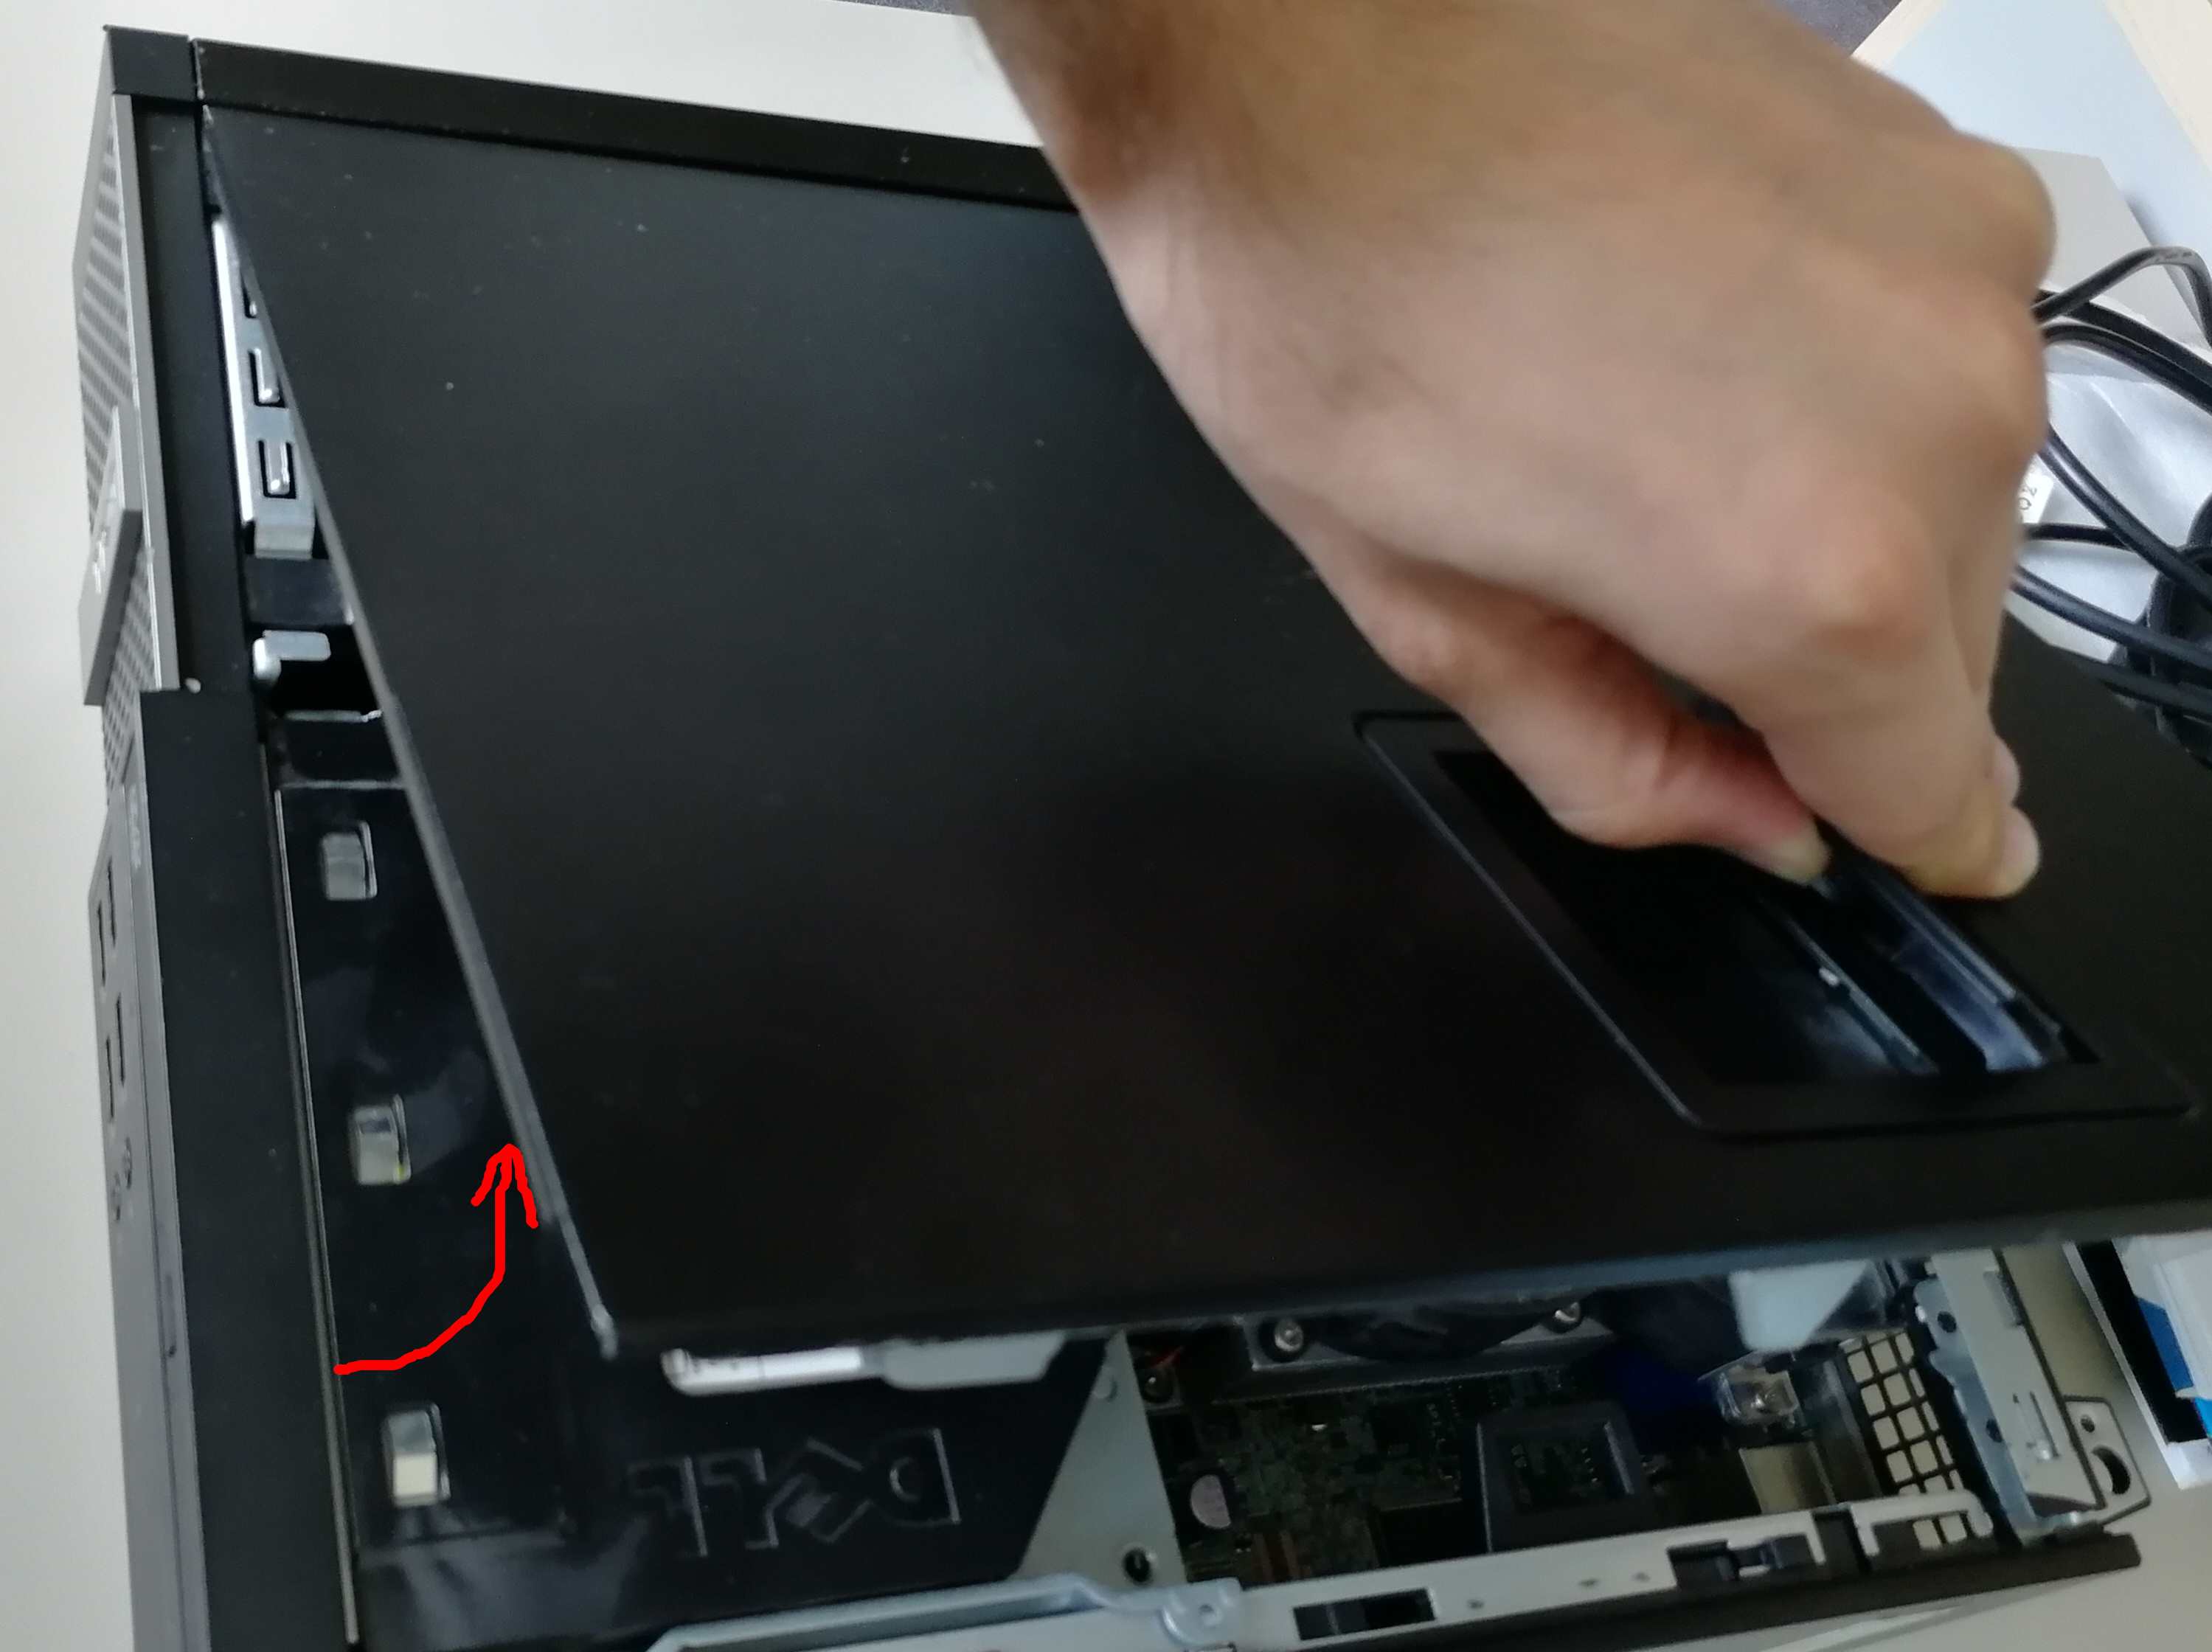
Lift the whole top cover and take it off.
-
Now, it is time to release the disk dock. Lift the handle of the CD/DVD drive bay.
-
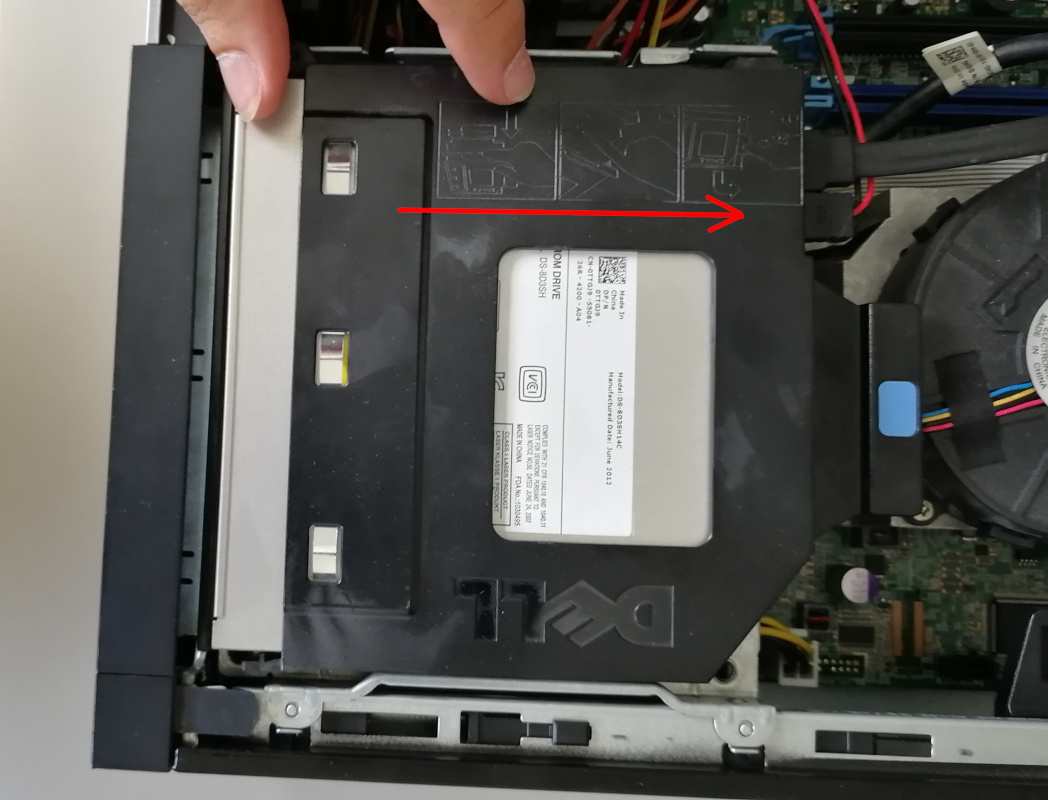
Pull the CD/DVD drive bay to the CPU fan side.
-
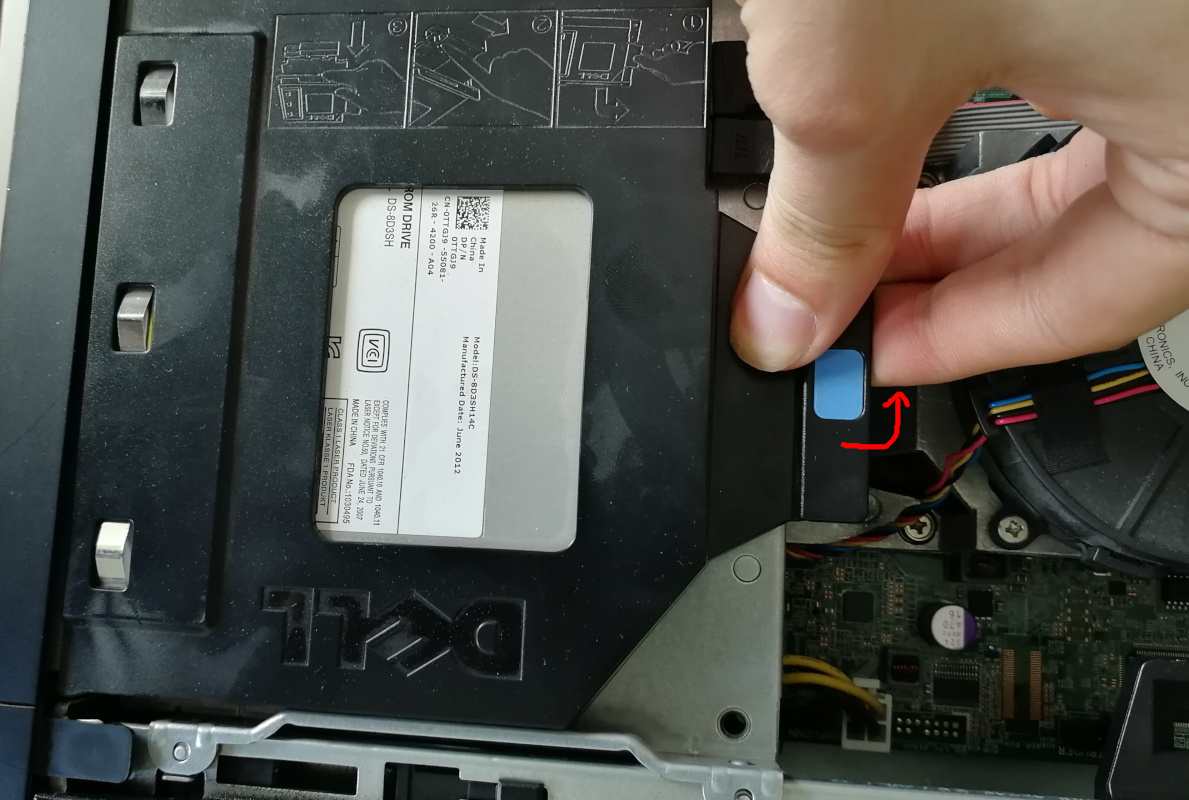
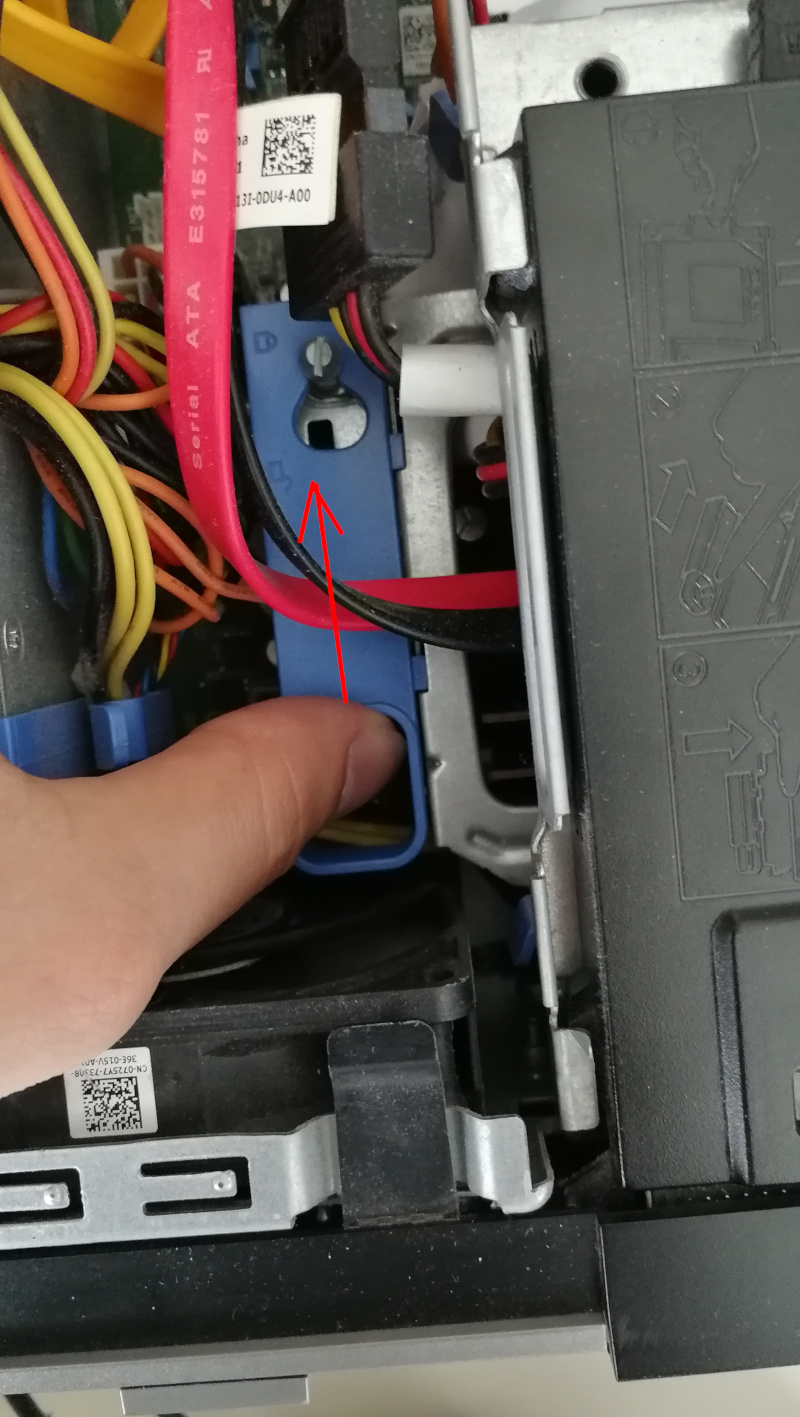
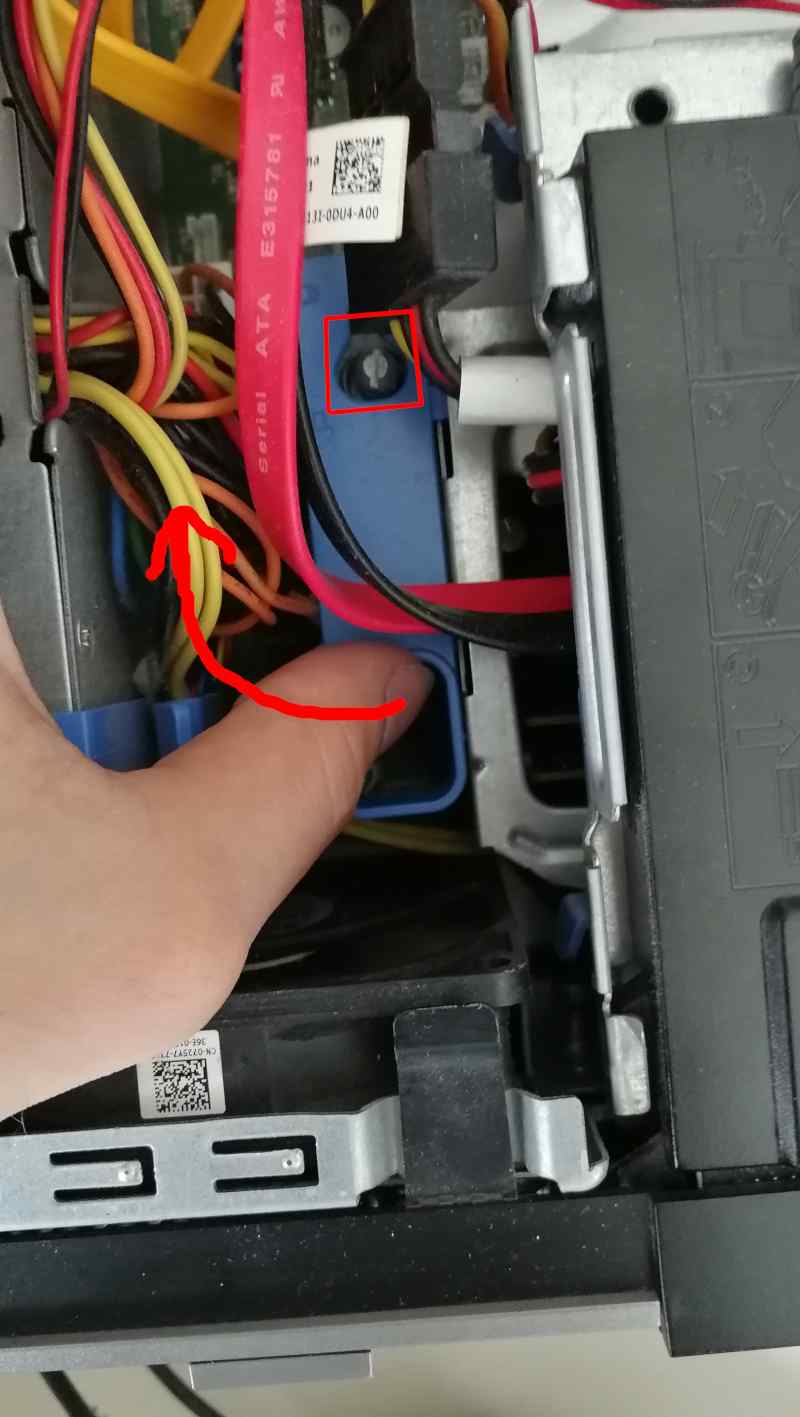
Move the blue disk dock handle to the CPU fan side.
-
The screw should be at the giant hole now. Lift the whole dock to remove it.
-
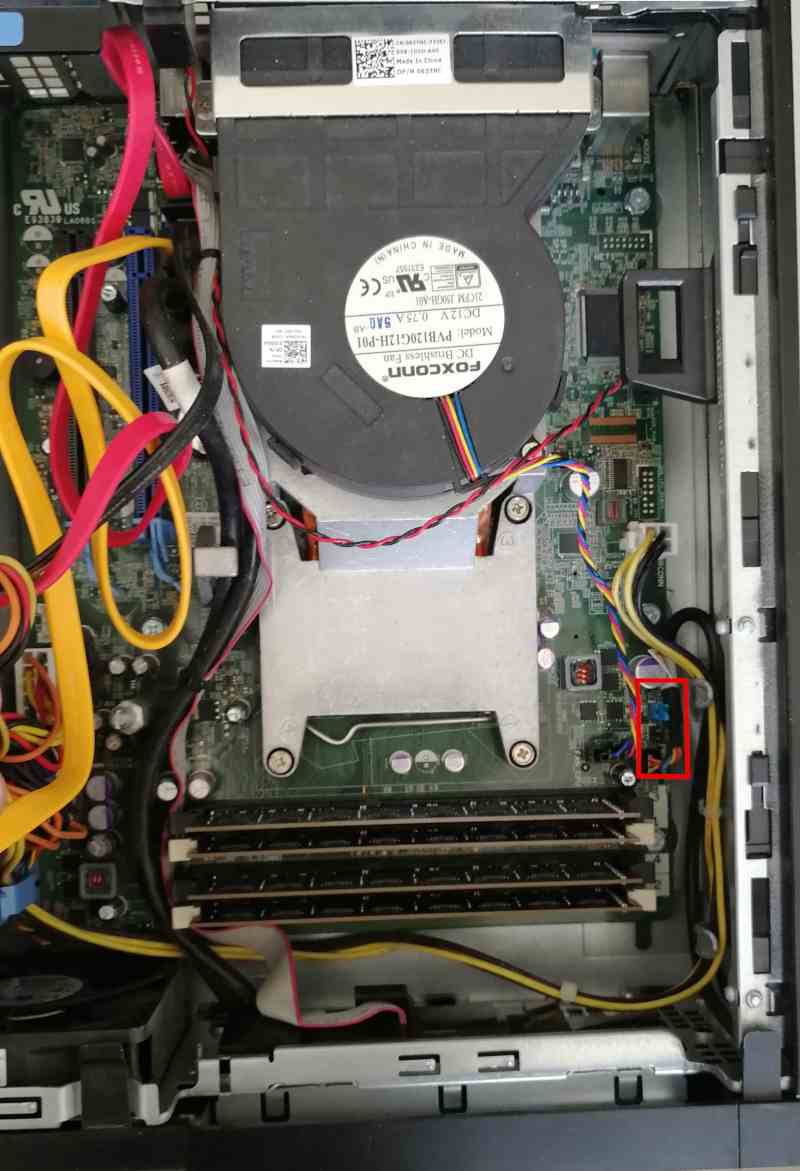
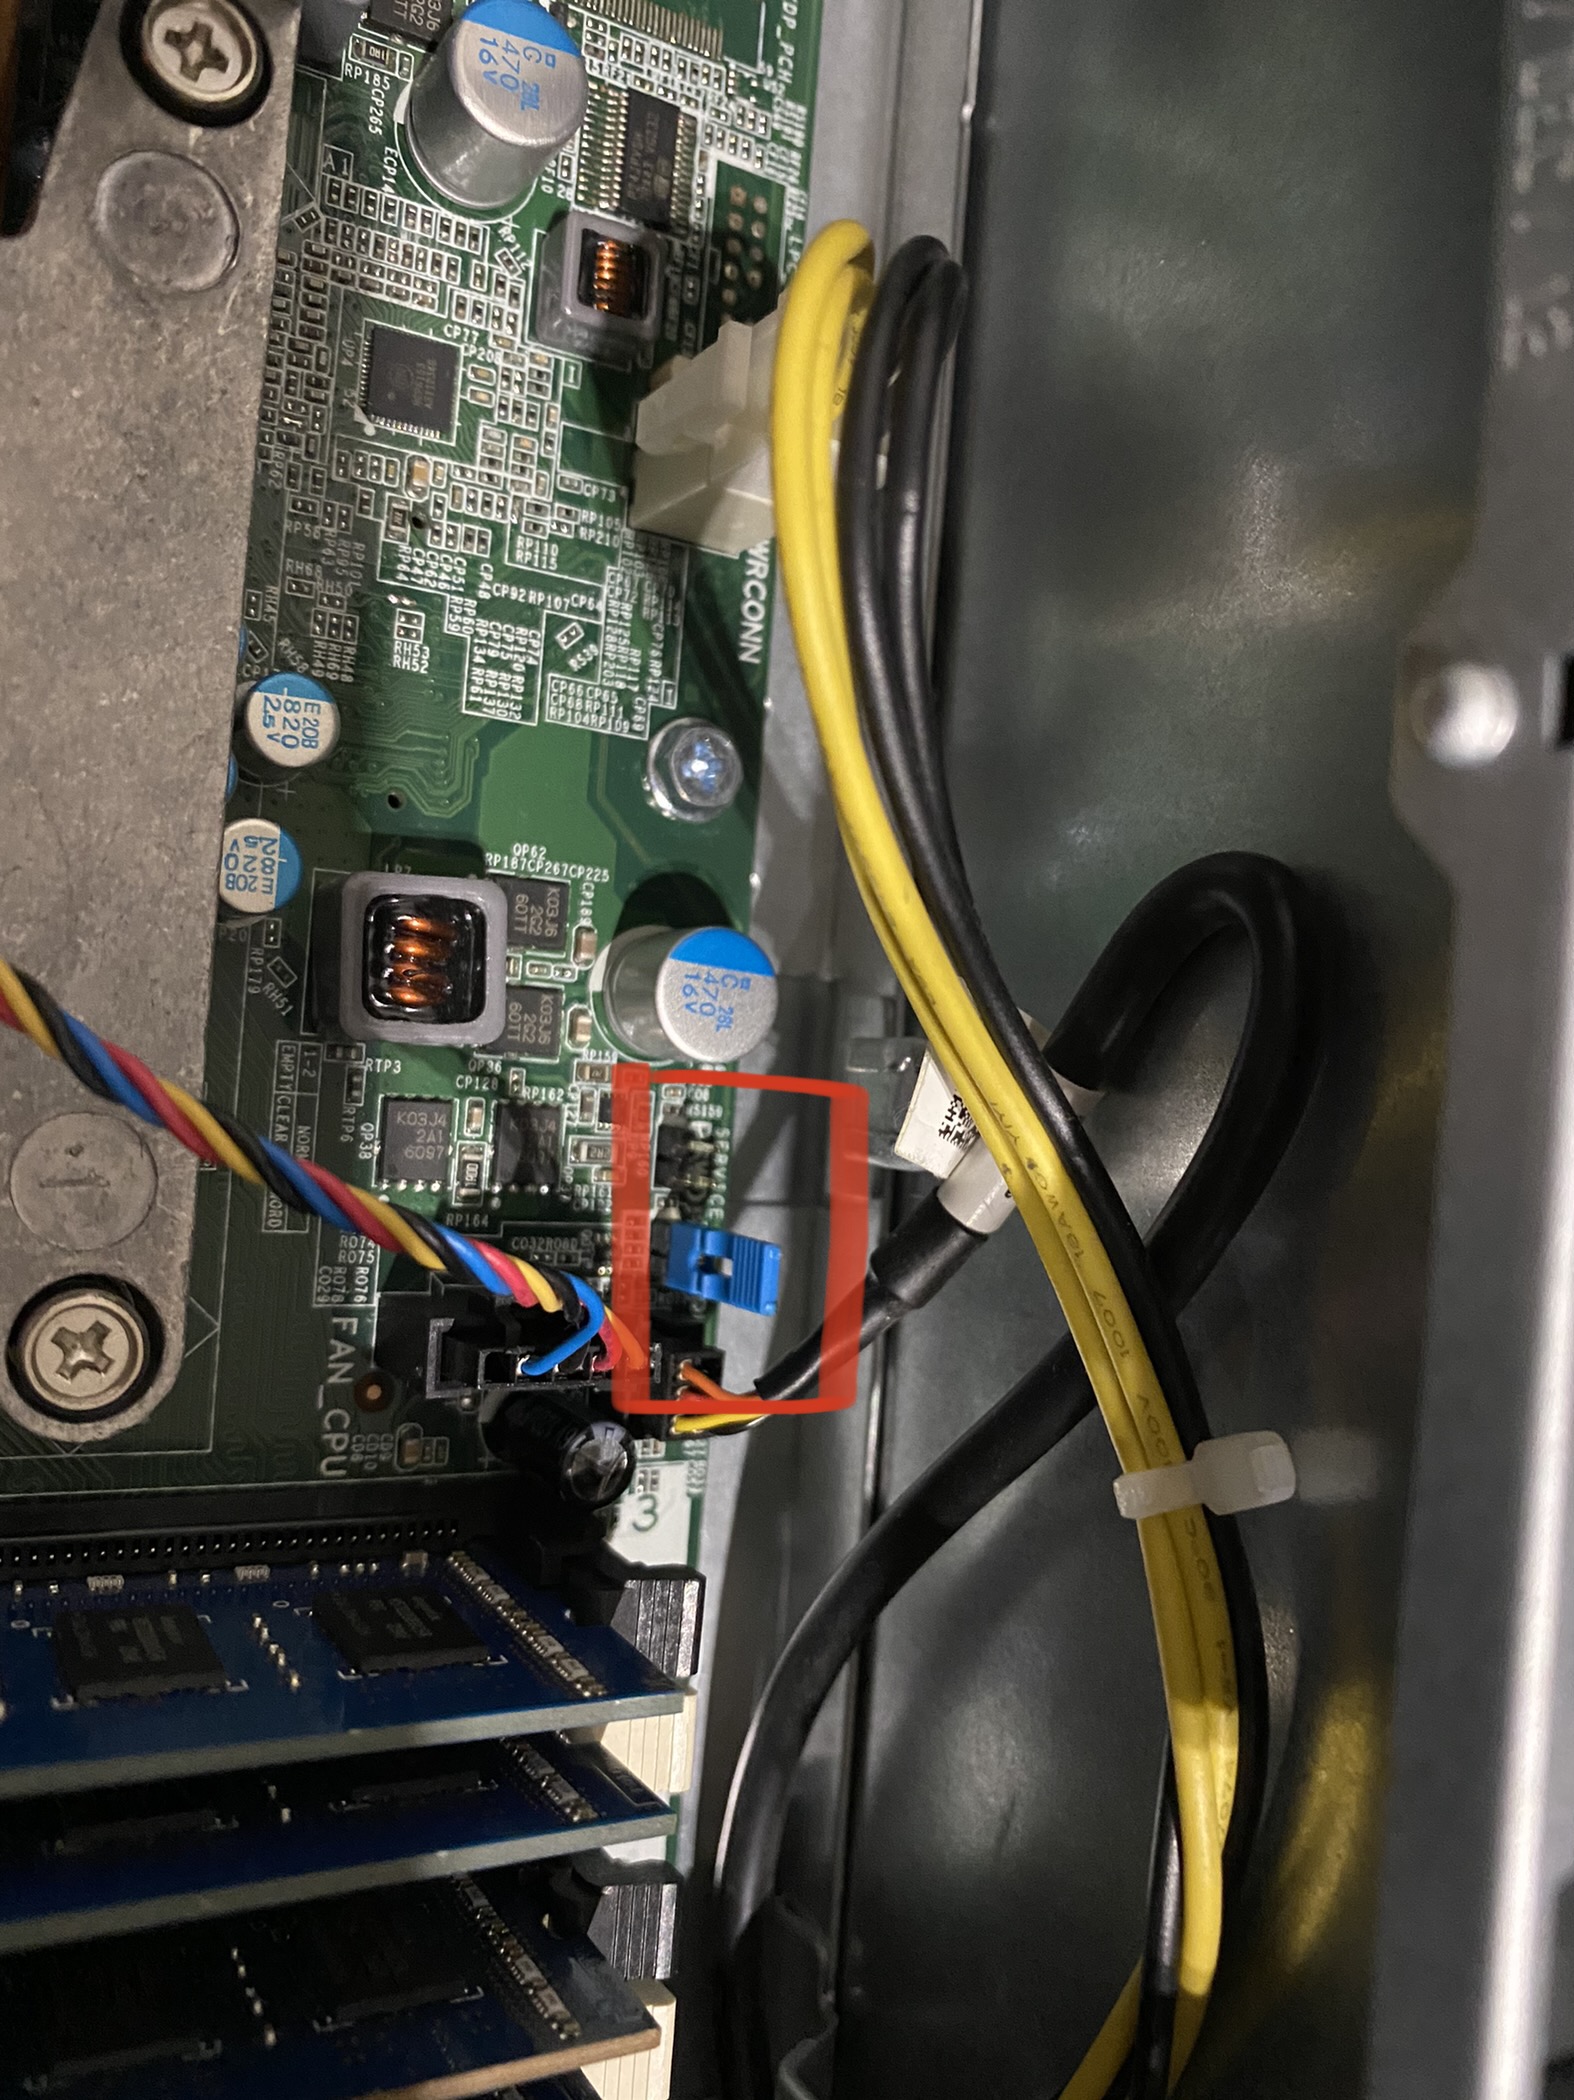
When the dock is removed, the service mode jumper should be visible.
-
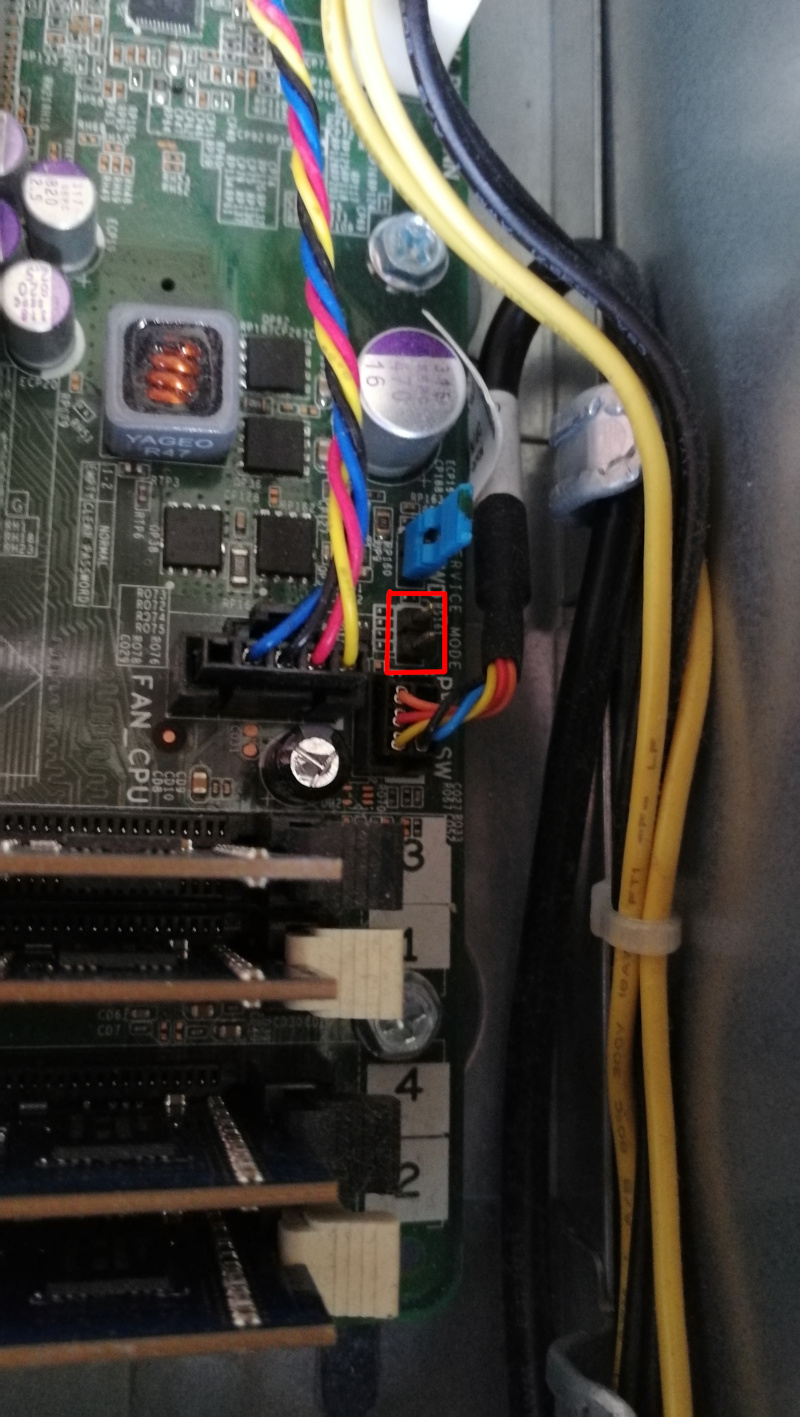
Place the jumper in the place marked by the red rectangle.
-
It should look like this.
-
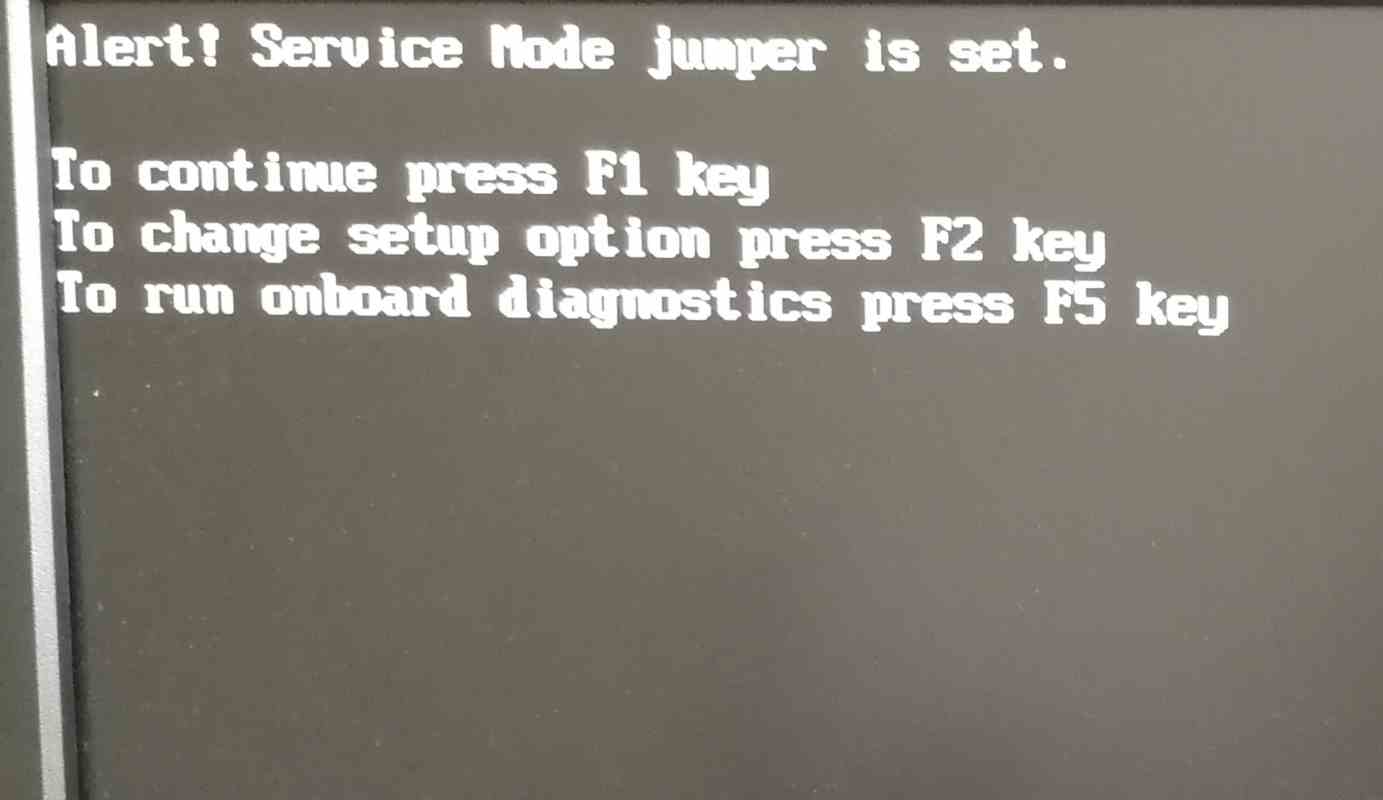
Power on the machine. You should see a warning that the service jumper is active. Press F1 to proceed and boot to your Linux system.
Initial deployment
The deployment process depends on how you get Dasharo. If you got a Pro Package please use the "Zero Touch" method to ensure a smooth installation. If you built yourself you have to use the manual method.
Use the latest release of Dasharo Tools Suite and follow the Dasharo zero-touch initial deployment documentation. This will help you set up Dasharo effectively and without manual intervention.
To flash your Dasharo binary manual it is recommended to use Flashrom on DTS like this:
flashrom -p internal -w coreboot.rom --ifd -i bios
Verification
- If everything went well (flashrom has verified the flash content),
- Shut down the machine, move the jumper to the original place
- Power on the machine.
- After rebooting, you should see the Dasharo Workstation logo when booting. When the logo appears, you may press Esc to select the boot device if you want to reboot from another source.

From that point you can use firmware update methods to update your firmware.
Troubleshooting
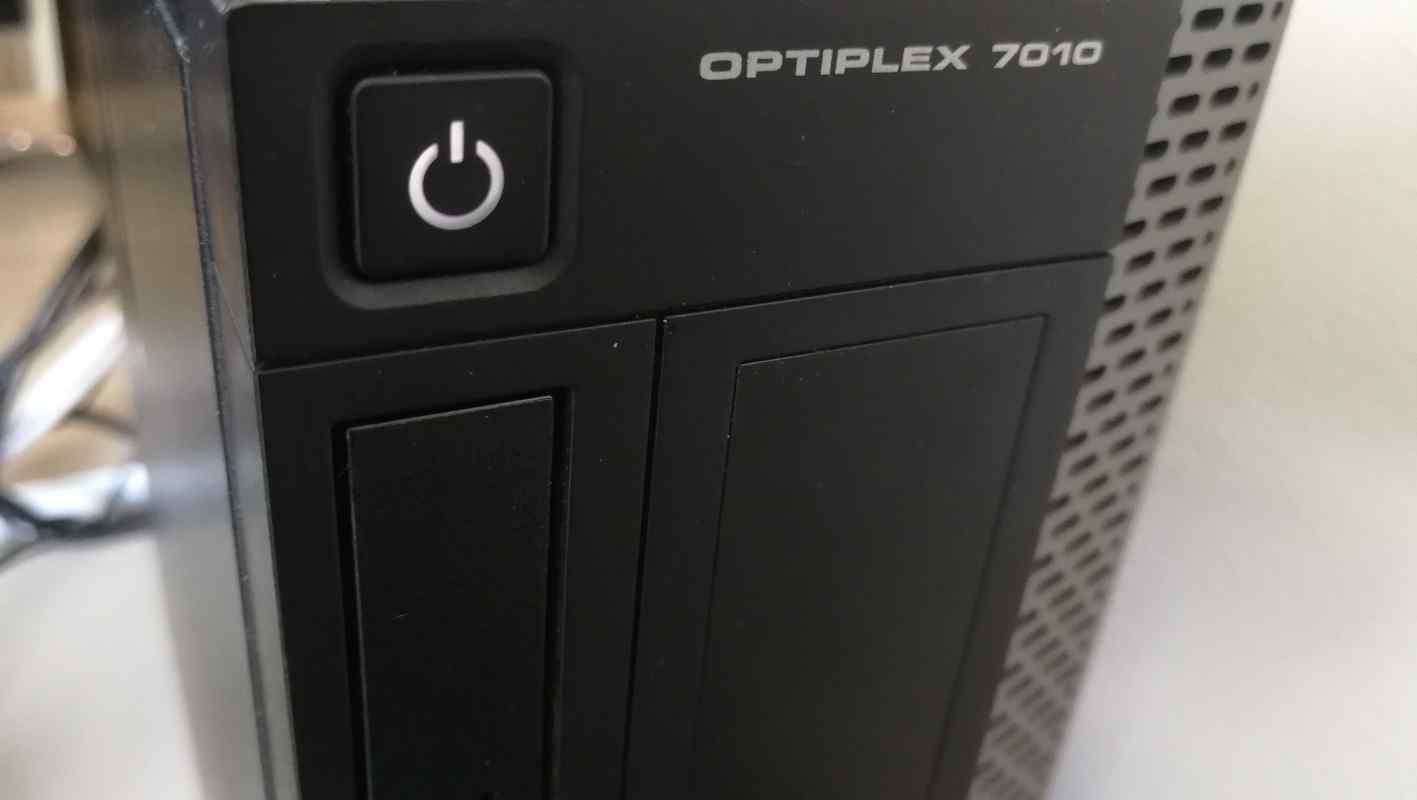
If you do not see the logo after a few seconds, something probably went wrong, or you encountered a bug. If the LED on the power button shines white, that means the platform booted correctly.
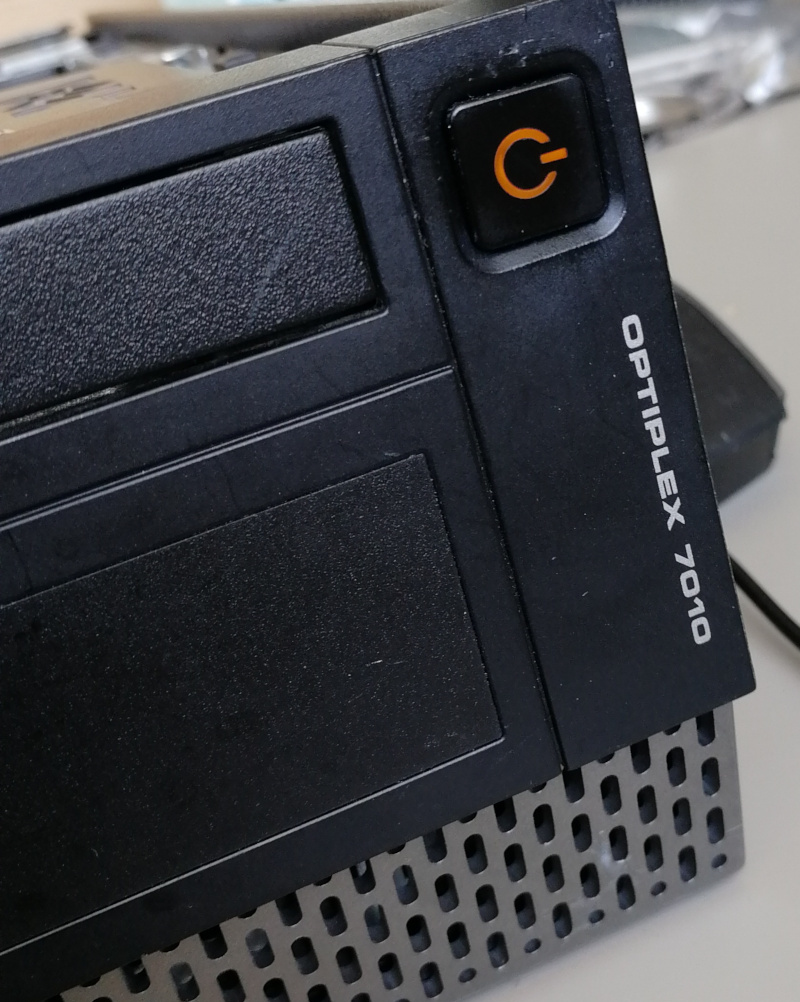
If the power button LED constantly shines in orange color, that means you have hit an error. The LED will start blinking soon.
 If you see the logo and after that system does not starts (black screen), please
take the following steps:
If you see the logo and after that system does not starts (black screen), please
take the following steps:
- Put a bootable USB stick to the USB port.
- Restart the computer using the power button.
- Press the Esc key to enter a boot menu.
- Choose a USB drive from the list.
- Re-install the operating system.
Common deployment problems you can find in FAQ.
Ubuntu installation
Ubuntu legacy installers have problems with graphical setup mode. When you see this error:
graphics initialization failed
Error setting up gfxboot
boot:_
You need a workaround to proceed with the installation. To boot the installer,
type live-install and press ENTER. It will boot to Ubuntu Live, and the
installer will launch automatically.
Version affected: Dasharo Workstation v0.1.
If you see blinking yellow LED and black screen after reboot: 1. Unplug the power supply cable 2. Wait for the 30s 3. Plug in the power supply again (machine should start automatically)
Bug reporting
If you encountered an error or bug, please report it in the Dasharo Issues repo.